## 南藝工作坊: 那些應該知道有關 Arduino 的基礎知識
<!-- Put the link to this slide here so people can follow -->
##### Slide: https://hackmd.io/@J-T-LEE/TNNUAWorkShop
---
### Who am I?
- LEE JEN TUN 李仁敦
- Japan Advanced Insitutite of Science and Technology Knowledge Science Ph,D Student
---
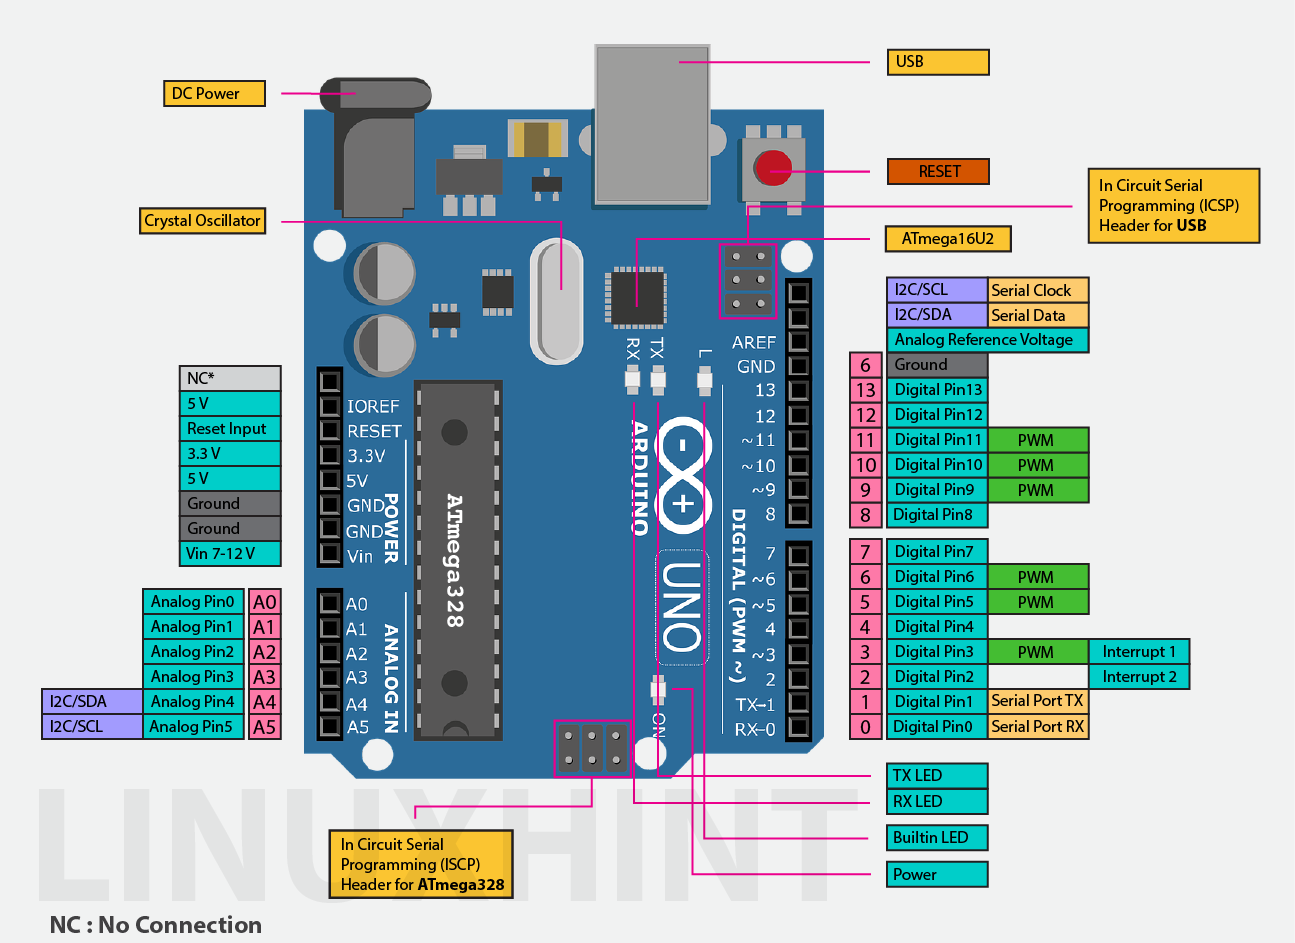
### 認識今天的主角 Wemos D1 mini
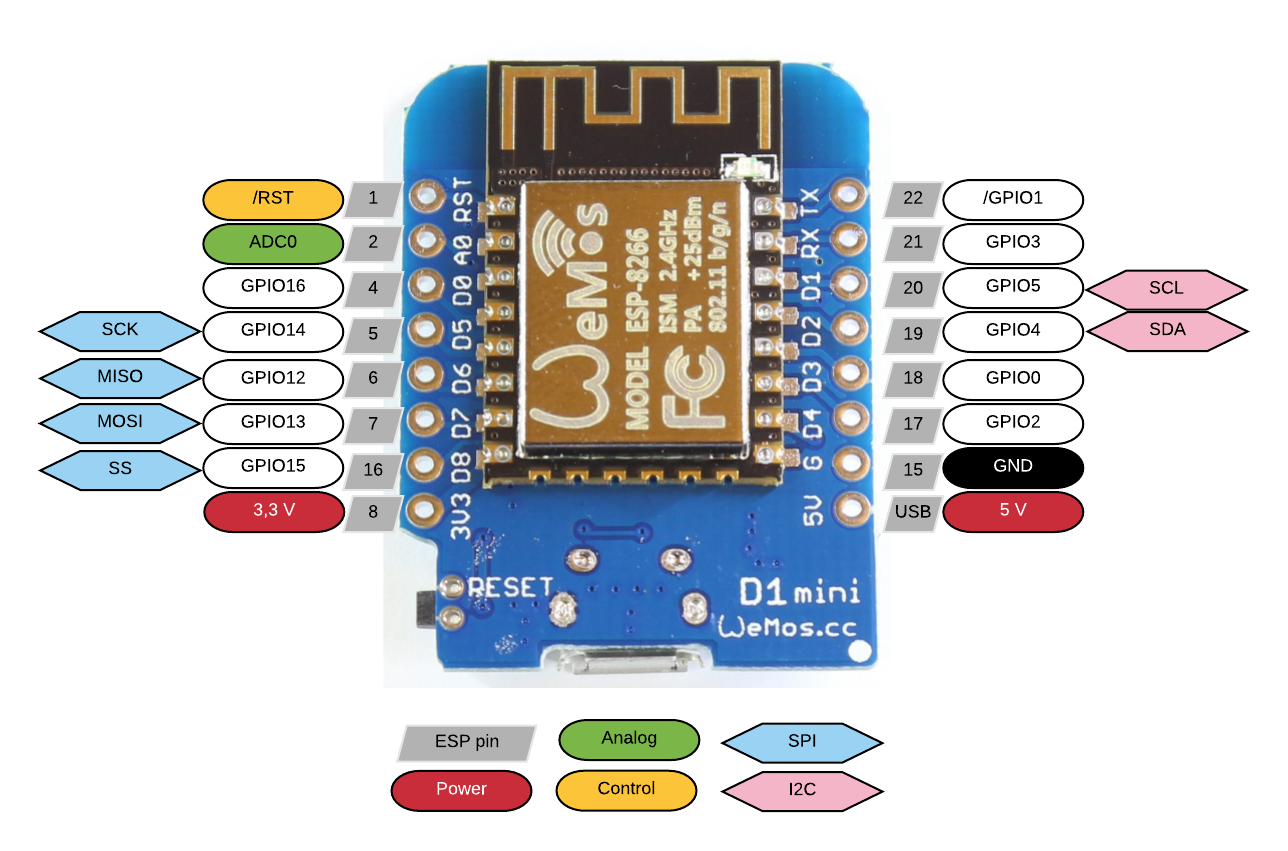
###### [圖片出處](https://lh6.googleusercontent.com/1HNuR1DSxBv0rdsqe6orNEGFBKcSty-FdAHWcSTm9kQ-VPnEsThmpWEsfn5gzTLsLkf0xKzhnp5GoxAIA4KeZmcC-TPBUoDKaB1toKvXCaIHFMr8RUDkVLCj1TFpEMB3A9pC--1w)
<!-- 哪些腳位是我們一開始需要知道的? 像是 VCC GND Digital Pin, Analog Pin, I2C SDK & SCL 等 都是常用的腳位-->
---
### 常見腳位
| Pin Name | Description |
| ------------- |:--------:|
| 電壓(VCC) | 3.3v or 5v |
| 對地腳(GND) | 接地腳 |
| 數位IO腳(D0~Dxx) | 針對數位訊號 |
| 類比IO腳(A0~Axx) | 針對類比訊號 |
| I2C(SDA & SCL) | I2C 通訊 |
| Uart(TX & RX) | Uart 通訊 |
<!-- -->
---
### 數位訊號形式的感測器
以觸碰感測器為例
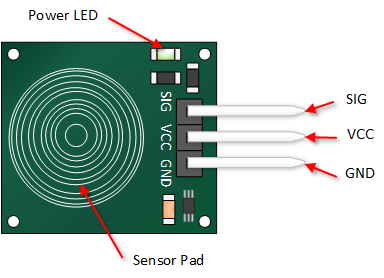
###### [圖片出處](https://embetronicx.com/wp-content/uploads/2018/04/touch-sensor-interfacing-pinout.png)
---
### 類比訊號形式的感測器
以壓力感測器為例

###### [圖片出處](http://4.bp.blogspot.com/-e-xKYJaq23g/Uu3Ouy1H4iI/AAAAAAAABaY/JahUNBh3E5Y/s1600/FSR.png)
----

###### [圖片出處](https://i1.wp.com/solarduino.com/wp-content/uploads/2020/06/multiplexer3-1.png?fit=1370%2C752&ssl=1)
---
### I2C通訊的感測器
以慣性感測器為例
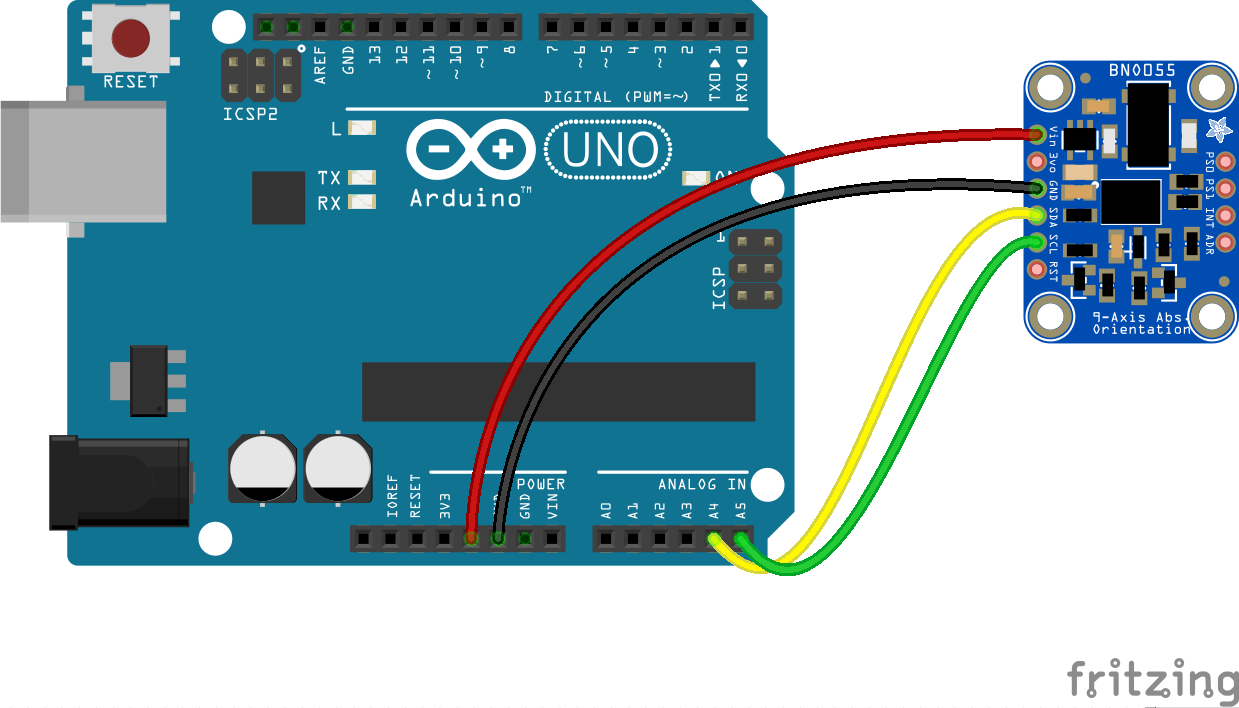
###### [圖片出處](https://johnny-five.readthedocs.io/en/latest/breadboard/imu-bno055.png)
----

###### [圖片出處](https://i.imgur.com/Vsf9Ca7.png)
----
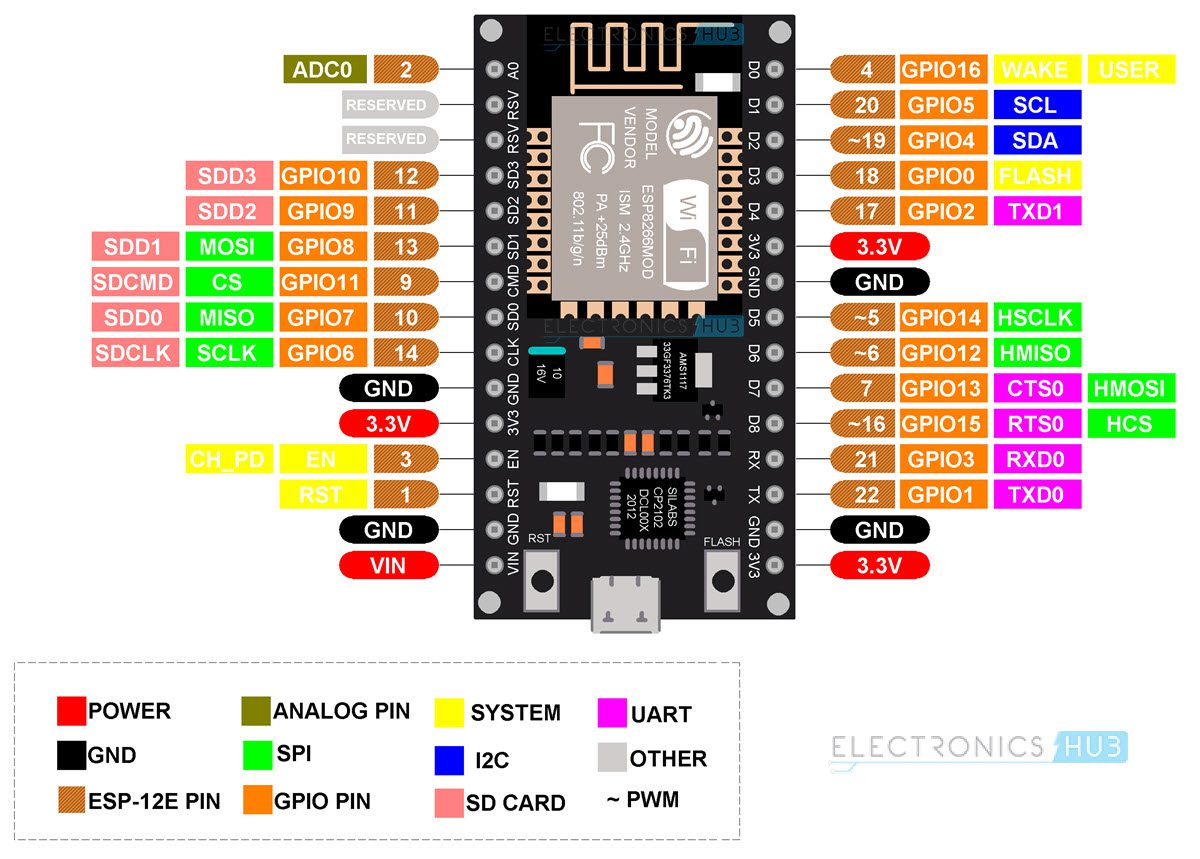
###### [圖片出處](https://www.electronicshub.org/wp-content/uploads/2021/02/NodeMCU-Pinout-Image.jpg)
----
###### [圖片出處](https://linuxhint.com/wp-content/uploads/2022/05/word-image-338.png)
---
### TX RX 通訊
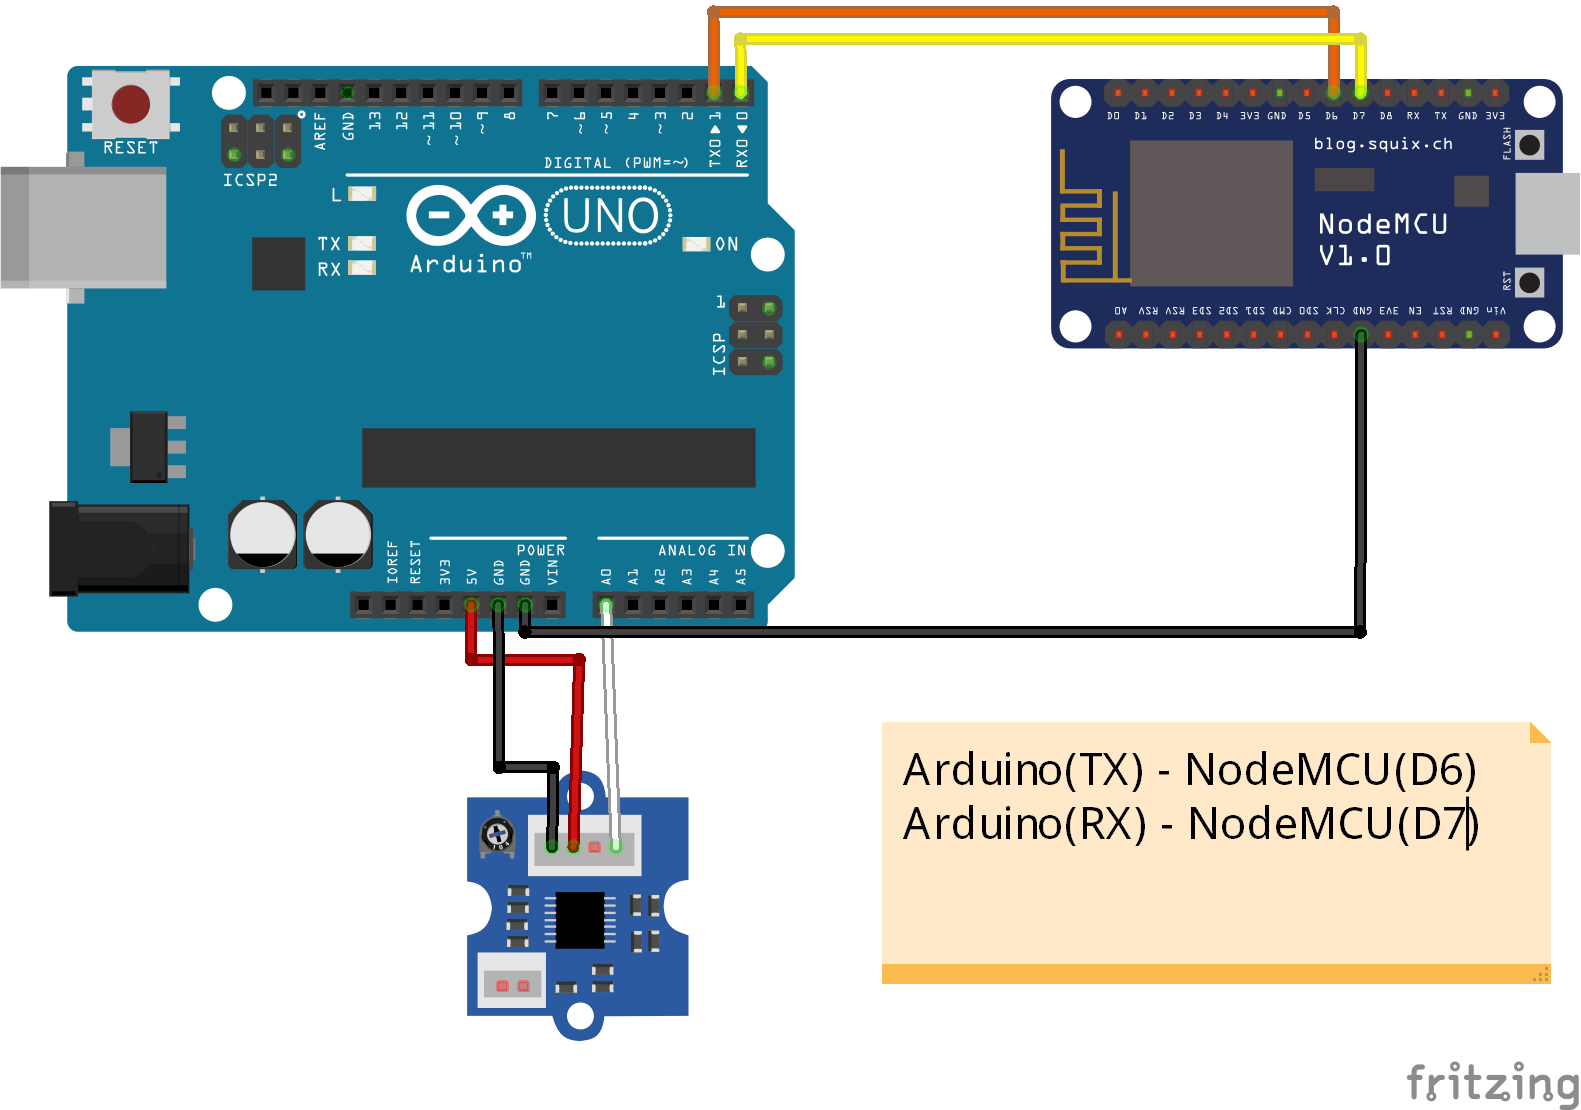
###### [圖片出處](https://forum.fritzing.org/uploads/default/original/2X/6/6ded765ba20db159ee16901b545e6ce7b72f8421.png)
---
### 麵包版介紹

###### [圖片出處](https://www.digikey.com/maker-media/9d540a8e-0230-4404-bf76-36f19ecac057)
----

###### [圖片出處](https://i.imgur.com/qiGwL6H.png)
---
#### 線頭的種類
##### 杜邦線

----
#### 快速接頭
---
### 認識簡單電路
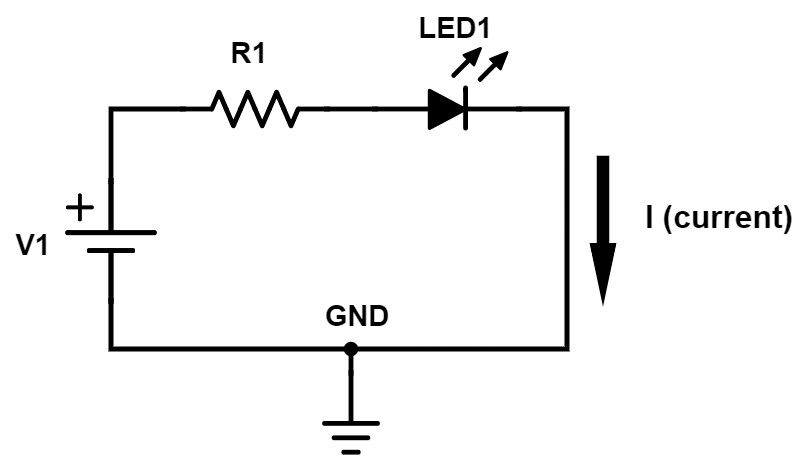
###### [圖片出處](https://predictabledesigns.com/wp-content/uploads/2018/10/electronic-circuit-voltage-source-resistor-le.jpeg)
---
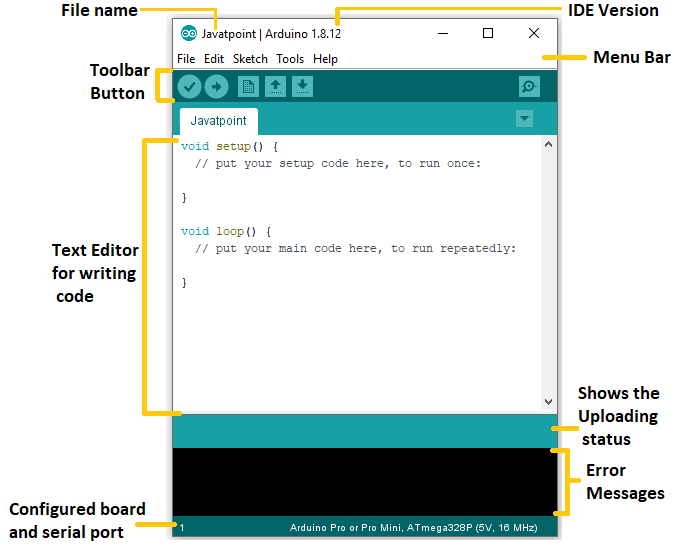
### 認識Arduino IDE
<!--
講解順序
1. 驗證程式碼
2. 如何上傳
3. 如何選擇板子
4. 如何確認Comport
5. 如何導入庫
6. 如何閱讀IDE的報錯訊息 以Serial begin 為例
-->
###### [圖片出處](https://static.javatpoint.com/tutorial/arduino/images/arduino-ide.png)
---
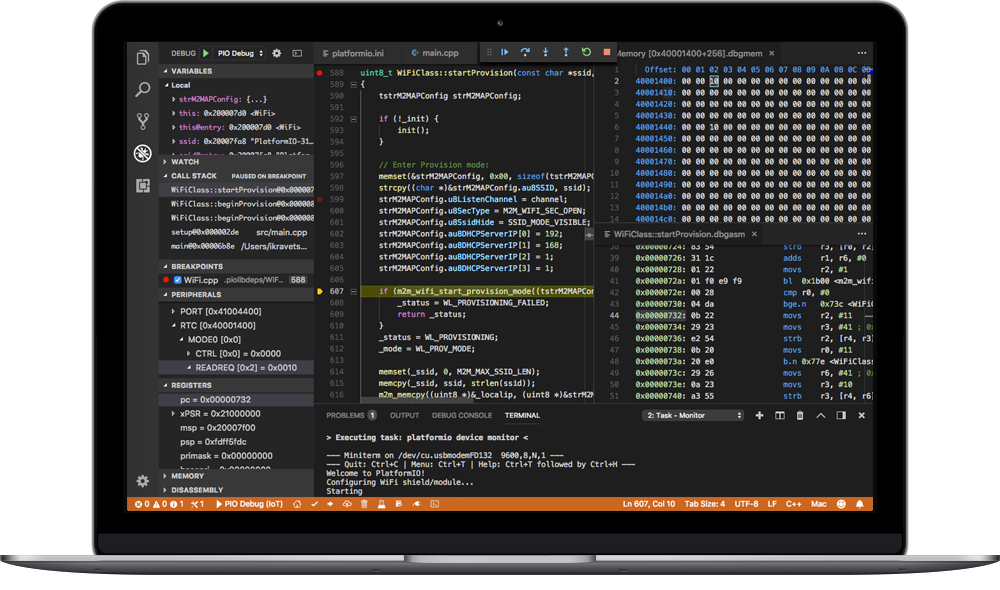
### 認識 PlateFormIO
---
### 看看其他人的作品
<center class="half">
<img src="https://prod.hackster-cdn.online/assets/hackster_avnet_logo_blue-5e47e3321ed9ae959a2668e6af7e176dda606786d7a0d2c968300b642b2c8756.png" width="200"/>
   
<img src="https://hackaday.io/img/hackaday-logo.svg" width="200"/>
   
<img src="https://i.imgur.com/WYrVe1W.png" width="200"/>
   
<img src="https://www.instructables.com/assets/img/instructables-logo-v2.png" width="80"/>
</center>
----

[hackster.io](https://www.hackster.io/arduino)

[Hackaday.io](https://hackaday.io/)

[Project Hub](https://create.arduino.cc/projecthub/projects/tags/arduino)

[Instructables](https://www.instructables.com/circuits/arduino/projects/)
---
### Serial Monitor
###### 序列監視器是常用來Debugging 或顯示程式的數據或值。
###### 需要將 Arduino 連接到您的電腦才能使用序列監視器。

```
void setup()
{
Serial.begin(9600);
}
void loop()
{
Serial.print("Hello World");
delay(1000);
}
```
----
###### 在這裡可以看到如何將值寫入序列監視器。 這可以是來自感測器的值,例如溫度感測器
```
int myValue = 0;
void setup()
{
Serial.begin(9600);
}
void loop()
{
myValue = random(100);
Serial.print("The Value is: ");
Serial.println(myValue);
delay(1000);
}
```
---
### 回想你們學過的程式碼
```
Void setup()
{
}
Void loop()
{
}
```
---
### Creating and Using Functions
```
int z;
void setup()
{
Serial.begin(9600);
}
void loop()
{
z = calculate(2,3);
Serial.print("The area is: ");
Serial.println(z);
delay(1000);
}
float calculate(int x, int y)
{
return (x + y);
}
```
----
### 練習寫出求圓面積的程式
###### 半徑(r) = 6, 圓周率(pi) = 3.14
```
void setup()
{
float area;
Serial.begin(9600);
// calculate the area of a circle with radius of 6
float r=6;
area = CircleArea(r);
Serial.print("Area of circle is: ");
// print area to 4 decimal places
Serial.println(area, 4);
}
void loop()
{
}
// calculate the area of a circle
float CircleArea(float radius)
{
float result;
const float pi = 3.14;
result = pi * radius * radius;
return result;
}
```
---
### 迴圈的概念
```
for(int i=0; i<100; i++){
do something
}
```
----
----
### 判別式的概念
```
什麼是 ==, &&, ||, !=
if( 條件式一 )
{
如果條件式一成立時做什麼...
}
else if( 條件式二 )
{
當條件式一不成立的情況下,如果條件式二成立時做什麼...
}
else if( 條件式三 )
{
當條件式一、二不成立的情況下,如果條件式三成立時做什麼...
}
else
{
當以上所有if都不成立時做什麼...
}
```
---
### 試著控制板子上的LED燈吧!
```
int ledPin = 13; //設定第13pin為接LED燈的pin腳
void setup()
{
pinMode(ledPin, OUTPUT); //設定pin腳模式為輸出
}
void loop()
{
digitalWrite(ledPin, HIGH); //給pin腳高電壓 (LED通電就亮)
delay(1000); //延遲1秒鐘(1000毫秒)
digitalWrite(ledPin, LOW); //給pin腳低電壓 (LED不通電就暗)
delay(1000); //延遲1秒鐘(1000毫秒)
}
```
---
### 使用函示控制LED燈

[TinkerCAD](https://www.tinkercad.com/things/0wWwSB3jtgt-editing-components/editel?lessonid=EFU6PEHIXGFUR1J&projectid=OGK4Q7VL20FZRV9&collectionid=O0K87SQL1W5N4P2&tenant=circuits#/lesson-viewer)
----
```
int led_red = 3; // the red LED is connected to Pin 3 of the Arduino
int led_yellow = 5; // the yellow LED is connected to Pin 5 of the Arduino
int led_green = 6; // the greed LED is connected to Pin 6 of the Arduino
void setup() {
// set up all the LEDs as OUTPUT
Serial.begin(9600);
pinMode(led_red, OUTPUT);
pinMode(led_yellow, OUTPUT);
pinMode(led_green, OUTPUT);
}
void loop() {
if(Serial.available()){
char readChar = Serial.read();
Serial.println(readChar);
if(readChar == 'a' ){
digitalWrite(led_red, HIGH);
for (int i = 0; i <= 255; i++){
Serial.println(i);
analogWrite(led_yellow, i);
delay(50);
}
}
else if(readChar == 'c'){
digitalWrite(led_red, LOW);
digitalWrite(led_yellow, LOW);
digitalWrite(led_green, LOW);
}
else{
digitalWrite(led_green, HIGH);
}
readChar = ' ';
}
}
```
---
### 控制數位式溫度感測器
```
int digitalPin = D7; // KY-028 digital interface
int analogPin = A0; // KY-028 analog interface
int digitalVal; // digital readings
int analogVal; //analog readings
void setup()
{
Serial.begin(9600);
}
void loop()
{
// Read the analog interface
analogVal = analogRead(analogPin);
Serial.println(analogVal); // print analog value to serial
delay(100);
}
```
---
### Thank you! :sheep:
You can find me on
- GitHub : https://github.com/bmpsst511
- or email me : bmpsst511@gmail.com
{"metaMigratedAt":"2023-06-17T11:08:41.859Z","metaMigratedFrom":"YAML","title":"南藝工作坊第一天","breaks":true,"description":"View with **Slide Mode**.","contributors":"[{\"id\":\"8c38baaf-c8e0-4c35-8827-d97a7d3beca1\",\"add\":21566,\"del\":12984}]"}