# Uploading photos to the Commons
A visual guide
---
## Installation
<div style="display:inline-flex;align-items:left;">
<div left>
</div>
<div style="font-size:100%;display:flex;background-color:rgb(127 195 140/0.5);padding:1px;justify-content:flex-end;">
<div style="flex-direction:column; text-align:left">
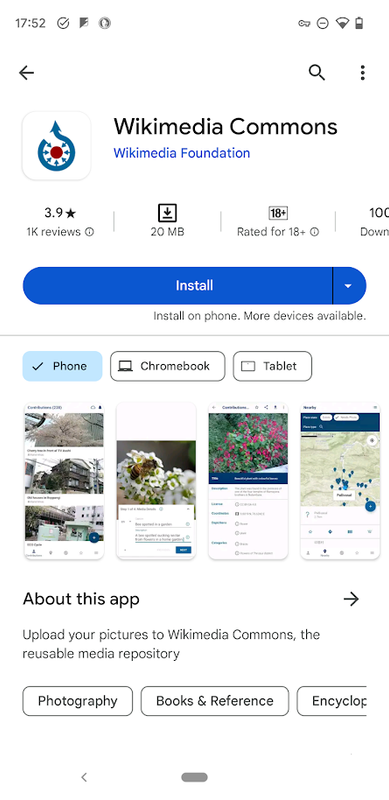
* Download and install the [Wikimedia Commons App](https://play.google.com/store/apps/details?id=fr.free.nrw.commons) for Android from the Play Store.
:::warning
iOS users, please use the [web version](https://commons.wikimedia.org/wiki/Special:UploadWizard) instead.
:::
</div>
</div>
</div>
---
## Account Sign-up
<div style="display:inline-flex;align-items:left;">
<div left>
</div>
<div style="font-size:100%;display:flex;background-color:rgb(127 195 140/0.5);padding:1px;justify-content:flex-end;">
<div style="flex-direction:column; text-align:left">
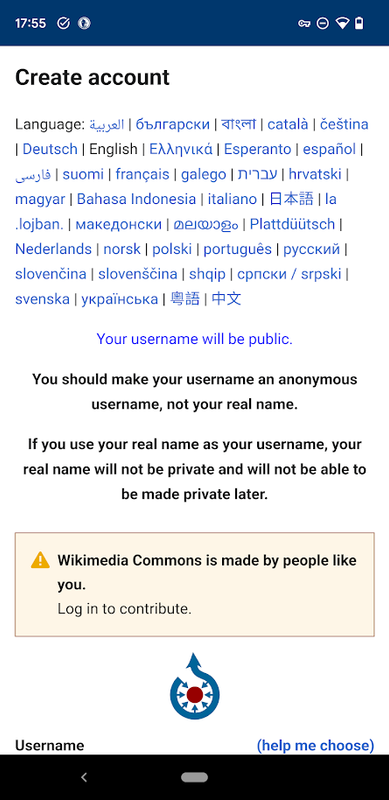
* Launch App, and follow the [sign-up page](https://commons.wikimedia.org/w/index.php?title=Special:CreateAccount) diretions
* Register for an account by creating your credentials
</div>
</div>
</div>
---
## Log-in
<div style="display:inline-flex;align-items:left;">
<div left>
</div>
<div style="font-size:100%;display:flex;background-color:rgb(127 195 140/0.5);padding:1px;justify-content:flex-end;">
<div style="flex-direction:column; text-align:left">
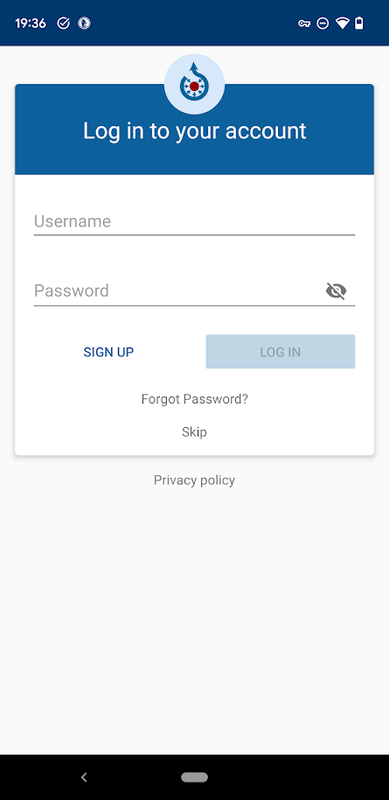
* After validation, you can now login with the credentials you submitted earlier.
::: danger
Un-validated accounts can't upload photos. Check your email inbox to validate!
:::
</div>
</div>
</div>
---
## Main screen
<div style="display:inline-flex;align-items:left;">
<div left>
</div>
<div style="font-size:100%;display:flex;background-color:rgb(127 195 140/0.5);padding:1px;justify-content:flex-end;">
<div style="flex-direction:column; text-align:left">
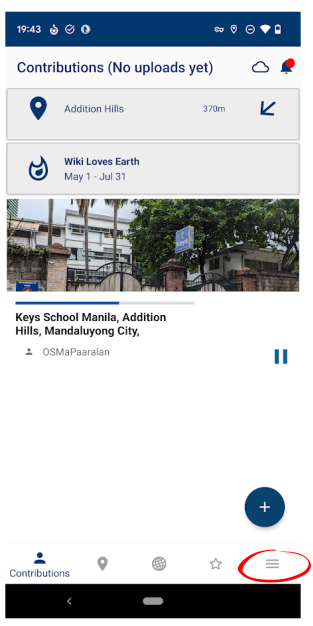
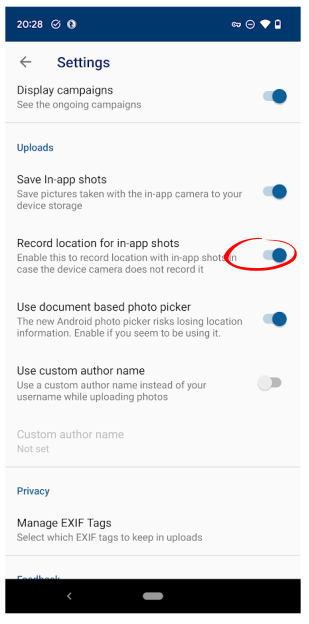
* Tap the burger menu and select settings.
* Scroll to look for "Record location for in-app shots".
</div>
</div>
</div>
----
## Enable record location
<div style="display:inline-flex;align-items:left;">
<div left>
</div>
<div style="font-size:100%;display:flex;background-color:rgb(127 195 140/0.5);padding:1px;justify-content:flex-end;">
<div style="flex-direction:column; text-align:left">
* Scroll down for "Record location for in-app shots".
* Switch-on the feature, then go back to the main screen
</div>
</div>
</div>
---
## Take a photo of your school
<div style="display:inline-flex;align-items:left;">
<div left>
</div>
<div style="font-size:90%;display:flex;background-color:rgb(127 195 140/0.5);padding:1px;justify-content:flex-end;">
<div style="flex-direction:column; text-align:left">
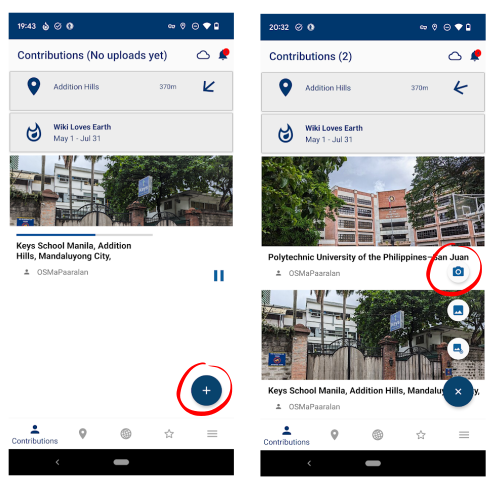
* From the lower right side of main screen, tap the blue "+" button, then select the camera icon to take a photo of your school facade
</div>
</div>
</div>
----
#### Tips for taking photos
* Shoot the school's main, public entrance, or a photo of the building facade (for building occupants)
* Shoot outdoors, with clear line of sight of the sky/horizon, to improve the accuracy of your photo's location.
* Shoot without obstructions, people nearby, and clearly depicts your school name or logo.
* Once the photo is satisfactory, tap the check button.
* No selfies!
----
<div style="display:inline-flex;align-items:left;">
<div left>
</div>
<div style="font-size:100%;display:flex;background-color:rgb(127 195 140/0.5);padding:1px;justify-content:flex-end;">
<div style="flex-direction:column; text-align:left">
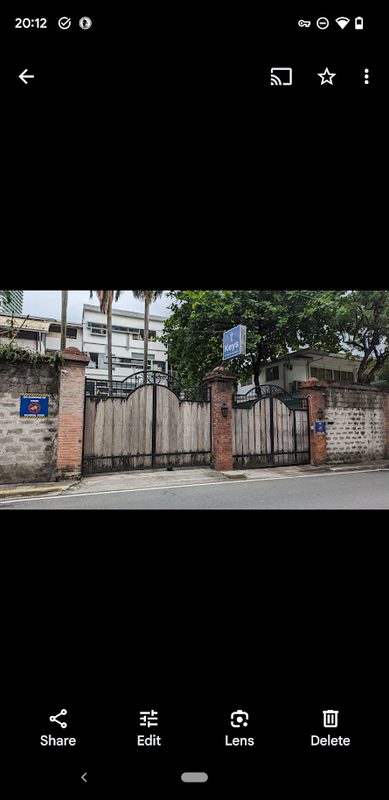
* Sample photo, as seen from a Gallery App
* 🗹 School name shown on signage
* 🗹 No people, or other objects around
* 🗹 Depicts school's main entrance
* This shot is a good candidate for upload!
</div>
</div>
</div>
---
## Step 1 of 4: Media Details
<div style="display:inline-flex;align-items:left;">
<div left>
</div>
<div style="font-size:100%;display:flex;background-color:rgb(127 195 140/0.5);padding:1px;justify-content:flex-end;">
<div style="flex-direction:column; text-align:left">
1. Validate the location. Click "Add location" or "Edit location"
2. Specify a **Caption**
3. Specify a **Description**
</div>
</div>
</div>
----
#### Location validation
<div style="display:inline-flex;align-items:left;">
<div left>
</div>
<div style="font-size:70%;display:flex;background-color:rgb(127 195 140/0.5);padding:1px;justify-content:flex-end;">
<div style="flex-direction:column; text-align:left">
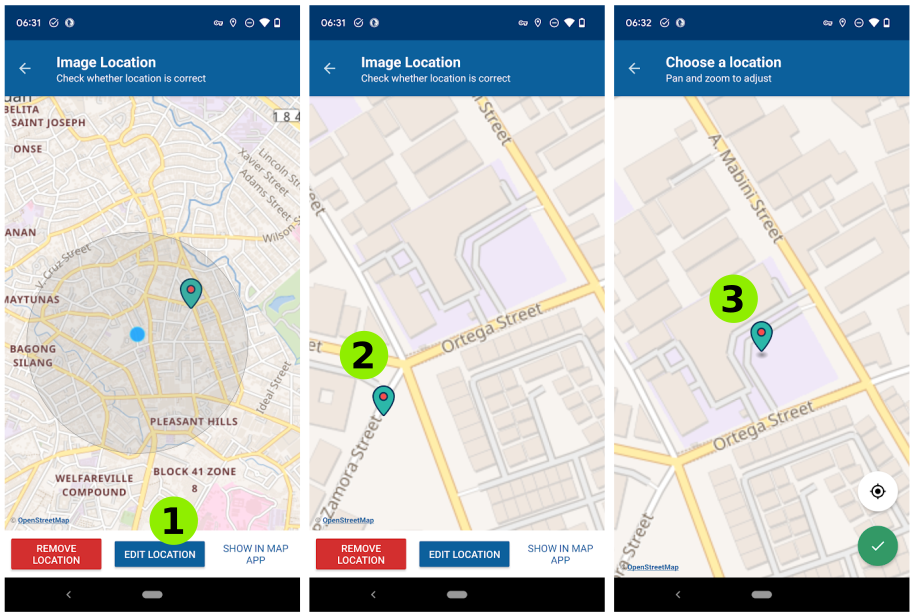
1. Click "Edit location"
2. Zoom in to your area of interest
3. Move the marker to where the actual school location then tap the check mark.
</div>
</div>
</div>
----
:::warning
The green marker represents the location where the photo was taken (for example across the street), rather than the actual school location.
Move the location to the center of the school grounds, or the center of the building the school occupies.
:::
----
#### Suggested template format
* **Caption**: `Keys School Manila, Addition Hills, Mandaluyong City`
* **Description**: `Keys Schools Manila is a non-sectarian, private school located at 951 Luna Mencias Street, corner Araullo Street, Addition Hills, Mandaluyong City, Philippines. It is duly recognized by the Philippine Department of Education, with school id: 1484019.`
---
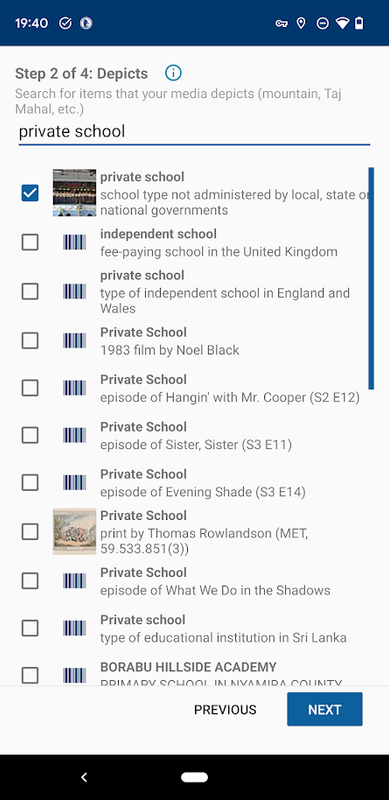
## Step 2 of 4: Depicts:
<div style="display:inline-flex;align-items:left;">
<div left>
</div>
<div style="font-size:100%;display:flex;background-color:rgb(127 195 140/0.5);padding:1px;justify-content:flex-end;">
<div style="flex-direction:column; text-align:left">
* Type "private school" in the text box, then tap "private school" to show a checkbox from the selection below
</div>
</div>
</div>
---
## Step 3 of 4: Categories:
<div style="display:inline-flex;align-items:left;">
<div left>
</div>
<div style="font-size:100%;display:flex;background-color:rgb(127 195 140/0.5);padding:1px;justify-content:flex-end;">
<div style="flex-direction:column; text-align:left">
* Again, type "private school" in the text box, then tap "private school" to show a checkbox from the selection below.
* Next, type the name of the appropriate municipality, for example "Mandaluyong City", then tap the item to select it.
</div>
</div>
</div>
----
:::info
EDCOM's own data validation workflow should include
* updating the photo's categories (e.g. adding them to the correct category for the province or municipality)
* re-validating the location provided by the contributor, and contacting them directly for clarification
:::
---
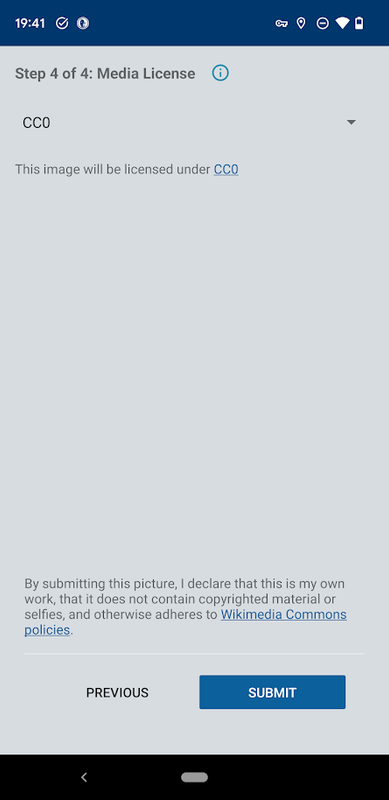
## Step 4 of 4: Media License:
<div style="display:inline-flex;align-items:left;">
<div left>
</div>
<div style="font-size:100%;display:flex;background-color:rgb(127 195 140/0.5);padding:1px;justify-content:flex-end;">
<div style="flex-direction:column; text-align:left">
* We strongly recommend choosing "CC0", to share their work under a universal Public Domain dedication.
* Click "Submit" button to upload to the server
* You may review the details, by clicking the "Previous" or "Next" buttons.
</div>
</div>
</div>
----
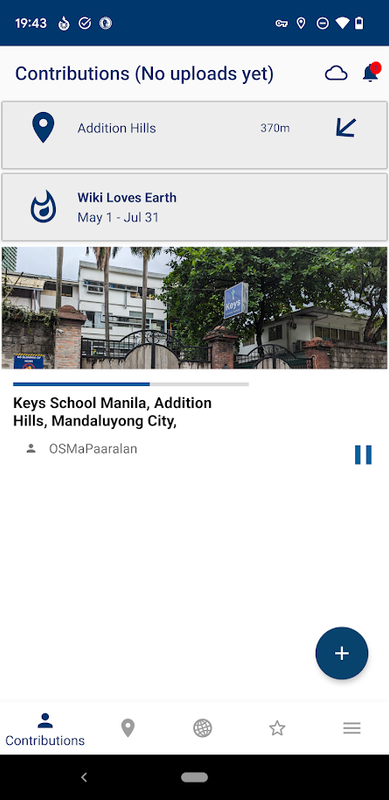
## Thanks for sharing to the Commons!
<div style="display:inline-flex;align-items:left;">
<div left>
</div>
<div style="font-size:100%;display:flex;background-color:rgb(127 195 140/0.5);padding:1px;justify-content:flex-end;">
<div style="flex-direction:column; text-align:left">
* The app will provide notifications when the upload process is complete.
* You may update the details of the photo after it's been uploaded.
* The shared photos are stored in the [Commons](https://commons.wikimedia.org/wiki/Special:NewFiles?mediatype[]=BITMAP&start=&end=&wpFormIdentifier=specialnewimages&limit=50&offset=).
</div>
</div>
</div>
---
#### Commons example: Keys School Manila
[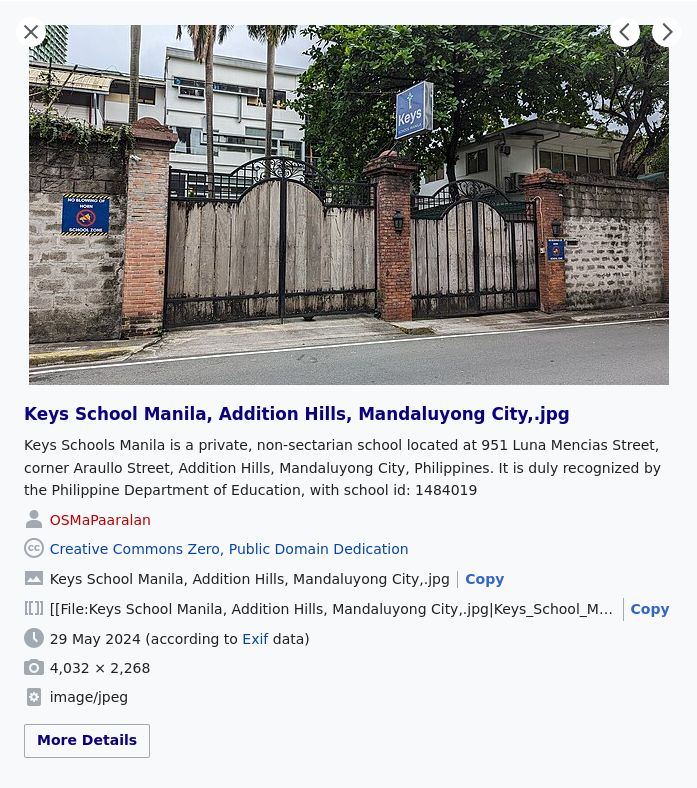](https://commons.wikimedia.org/wiki/File:Keys_School_Manila,_Addition_Hills,_Mandaluyong_City,.jpg)
---
#### Map example: Keys School Manila on a map
[](https://osmapp.org/relation/13360320#18.86/14.5918/121.0376)
---
FIN
{"title":"Visual Guide to uploading photos to the commons","description":"A visual guide","contributors":"[{\"id\":\"a7a29e82-c6b4-4048-8f99-6662f95044c7\",\"add\":10277,\"del\":1496}]"}