# Watch the entire video and identify all the objects in the scene
Before we begin, let's determine whether the task is **all-static** (no objects are moved by a person) or **dynamic** (ONE object is moved by a person).
**Tip**: Press `spacebar` to play the video
## Choose the appropriate workflow to follow
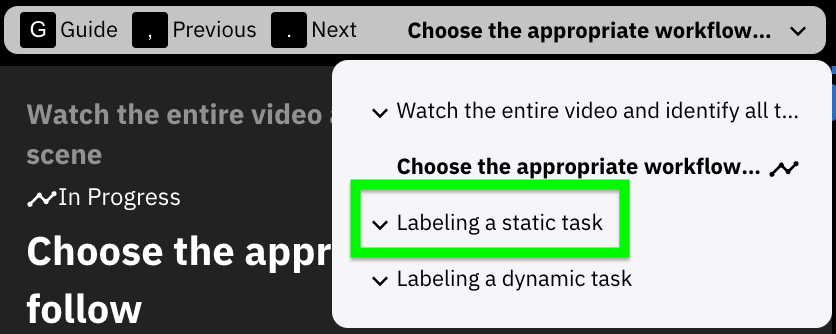
* If the task is **all-static**, follow the static instructions in the next section, or click `Labeling a static task` in the workflow dropdown:
* 
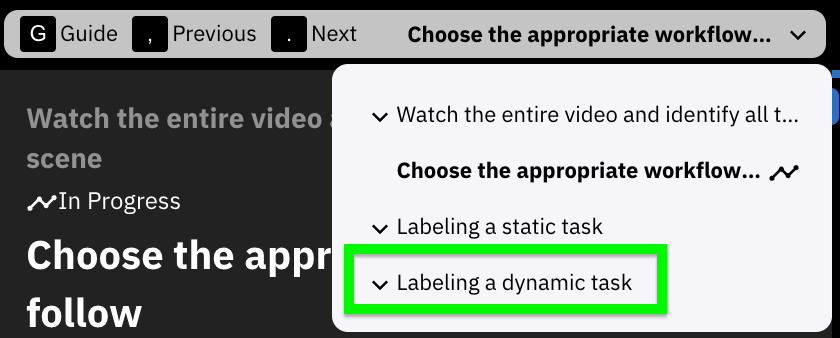
* If the task is **dynamic**, follow the dynamic instructions by clicking `Labeling a dynamic task` in the workflow dropdown:
* 
# Labeling a static task
Follow this workflow if none of the objects are moved by a person.
**List of Steps**
- Choose a static object included in the label list and find a frame where it is best visible
- Draw a cuboid around the static object
- Adjust cuboid position relative to both 2D and 3D space
- Adjust cuboid size and lock it in
- Adjust cuboid rotation
- Select the cuboid’s label
- Select the cuboid’s attributes (faces & symmetry)
- Adjust the cuboid visibility in the timeline
- Repeat until every object is labeled
## Choose a static object included in the label list and find a frame where it is best visible
It is typically best to start with an object that is sitting directly on the floor plane. Objects like chairs or tables can help you determine where the floor is in the scene.
## Draw a cuboid around the static object
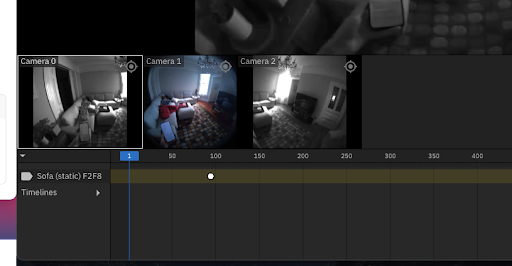
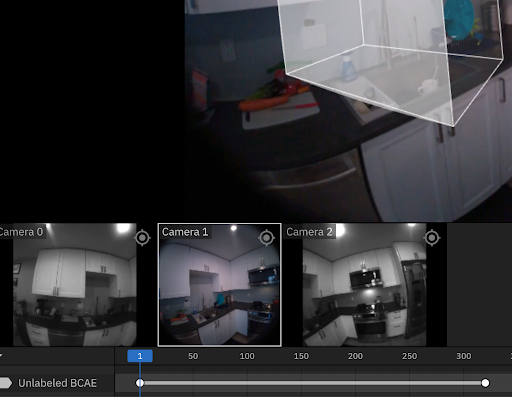
Navigate to a frame where the object is clear in the main / center camera and unblocked by other objects
Start in regular view and navigate to the middle camera (Camera 1).
**Add a new cuboid by going to the Cuboid annotation sidebar and clicking `+`, or hitting the `N` button:**
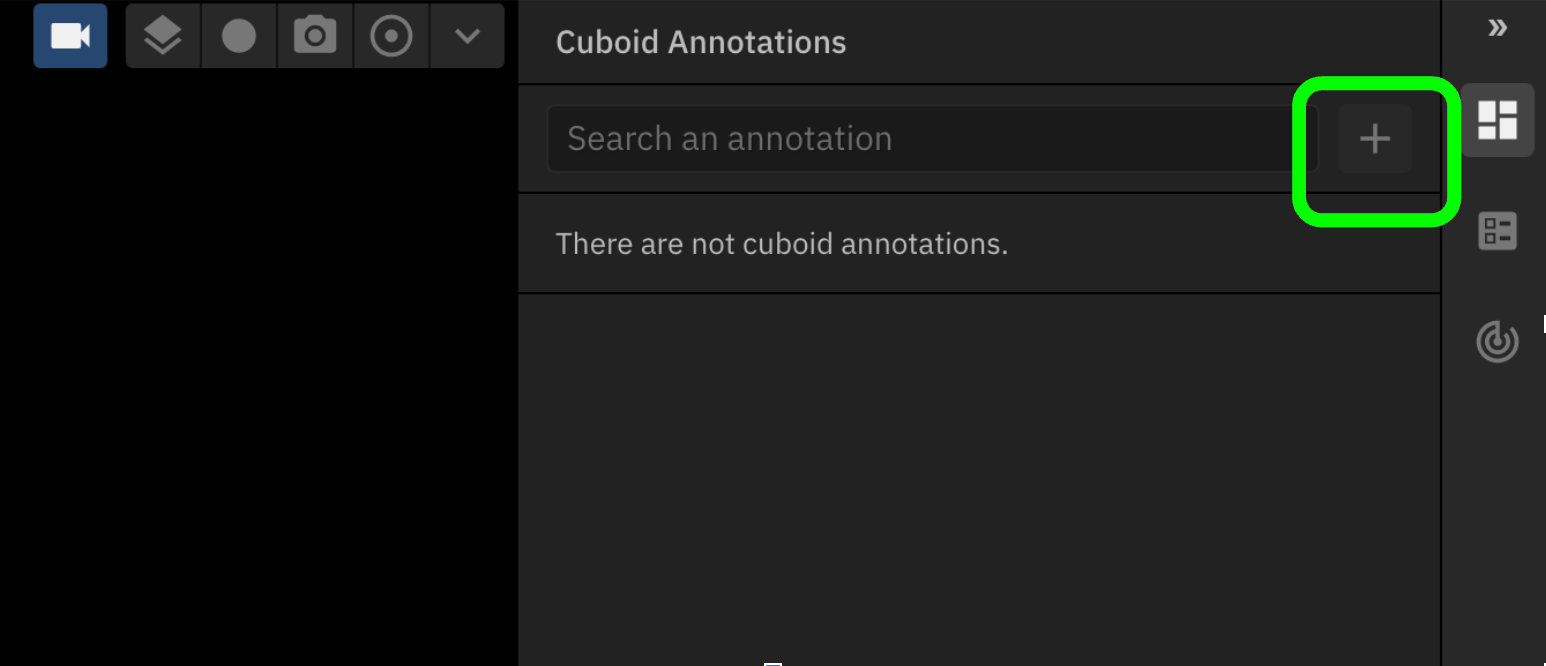
`!["timeEstimate", 2]!`
### Draw the initial cuboid
Make four clicks. First, click on each corner in the lower front part of the object. The third click represents the opposite corner on the bottom of your cuboid. The fourth click defines the height of your cuboid.
Always start by drawing the line at the front of the object. The first two clicks will decide the front part of the object.
**Example of Tooling**: Placing a cuboid on a chair:
`!["timeEstimate", 1]!`
### Adjust cuboid position & sizing relative to both 2D and 3D space
---
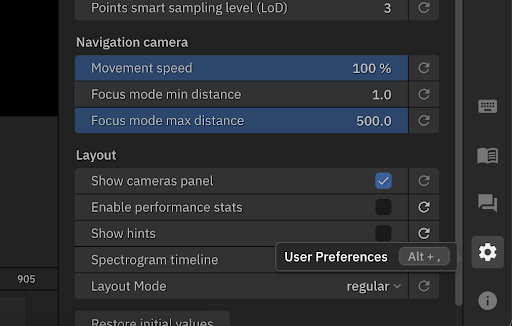
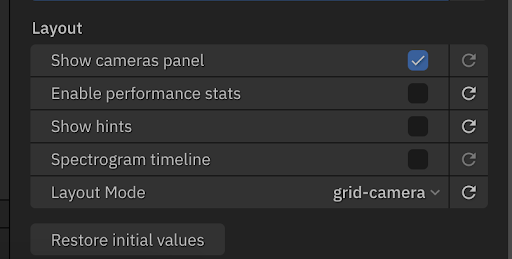
Switch to `grid view` in the **User Preferences** menu. This will help you see all three cameras at once!
* Note that some of the examples below are not in grid view.
---
Adjust cuboid position and sizing so it looks as accurate as possible
* Adjust positioning and sizing using the side views or the sliders on the far right
* Switch between a few frames near the original frame and check that it all looks good!
**Adjusting positioning**:
**Adjusting sizing**:
`!["timeEstimate", 2]!`
### Adjust rotation as needed
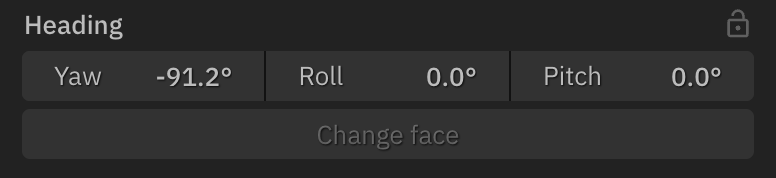
For objects that are standing on a flat surface straight up and down, like this chair, the only rotation that is really relevant is `Yaw`.
`Roll` and `Pitch` are not very relevant to these types of objects. However, if you tilted the chair in various directions, you might need to change the `Roll` and `Pitch`
---
Switch between a few frames near the original frame and check that it all looks good!
**Adjusting rotation / pitch / roll**:
**Heading panel:**
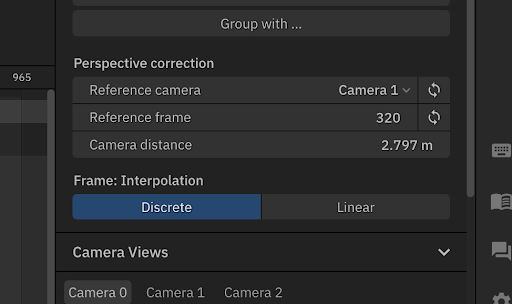
### Adjust the perspective correction
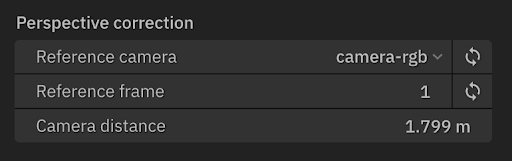
The perspective correct is where we determine the 7th degree of freedom: camera distance. This is how far away the object is from the camera!
---
* We set the camera distance on a specific frame and camera, generally the center camera (often called camera-rgb or Camera 1)
* When you first draw the cuboid, this distance will be calculated roughly for you. However, you need to adjust it using these toggles.
* Adjust the camera distance up and down until the cuboid lines up across all frames. You may also have to continue to adjust the size and position of the cuboid.
**Perspective correction panel**:
`!["timeEstimate", 3]!`
### Select the cuboid's label
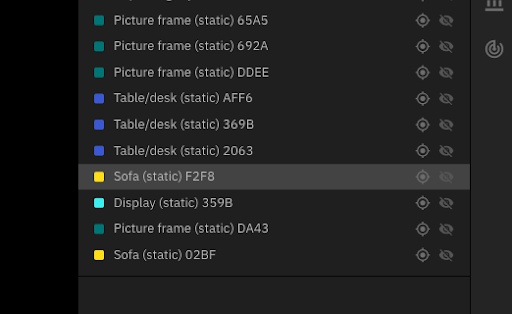
Select the label of the annotated object in the item list.

`!["timeEstimate", 1]!`
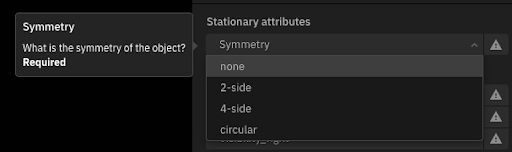
### Select the cuboid's symmetry
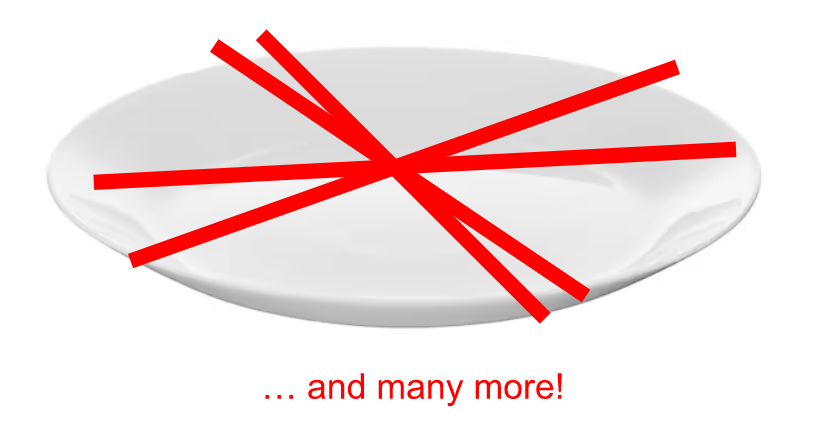
The symmetry of the object can be none, 2-sided, 4-sided, or circular.
Refer to the [symmetry guide](https://docs.google.com/document/d/e/2PACX-1vQr2z7XEGOLdgEiE5Tnse_gp1jgivMaOUhlJ9nHy81THBBef60BojRHaXhthh81vtszzBnKzKzb6Xnc/pub#h.vg4slv3ldyuf) to see examples of symmetry for all labels! (tip: right click to *Open Link in a New Tab*)
---
* **None**: There is no way to cut the object into multiple pieces that look the same
* **2-side**: There are 2 identical sides of the object, so it can be cut into 2 pieces that look the same if they are reflected or rotated
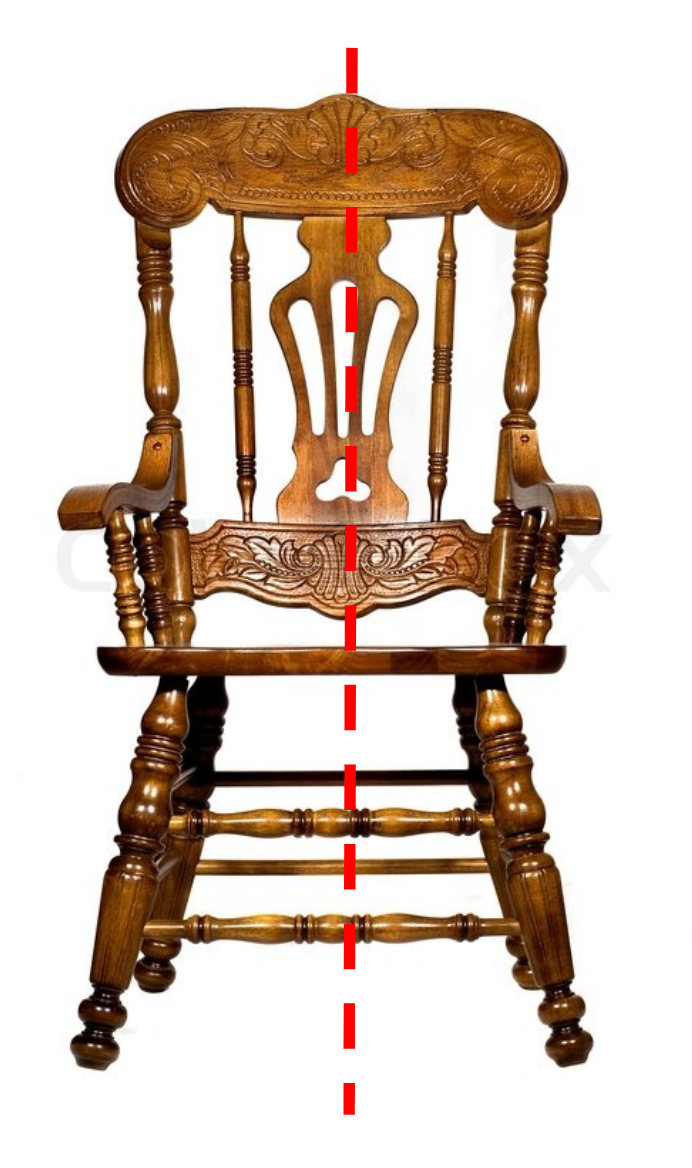
* **4-side**: There are 4 identical sides of the object, so it can be cut into 4 pieces that look the same if they are reflected or rotated
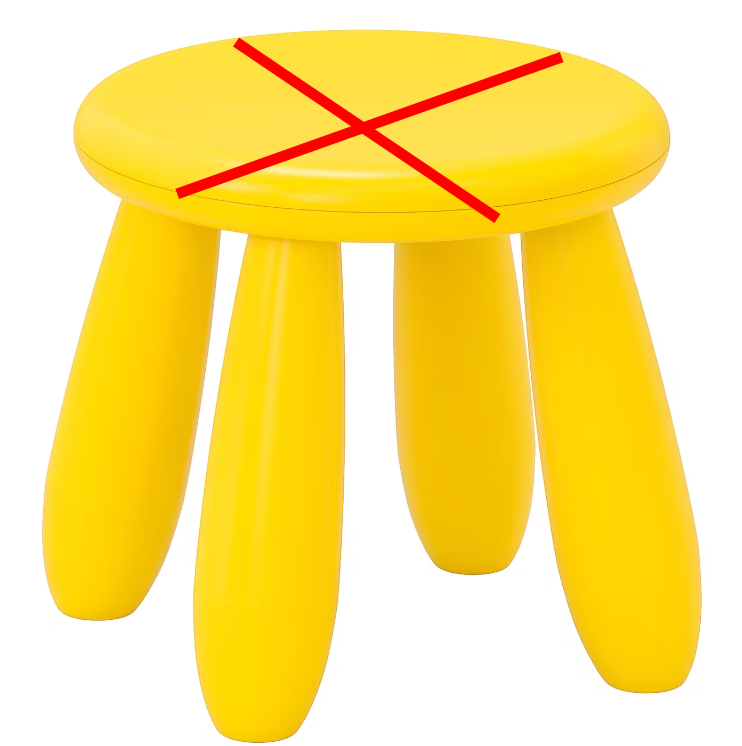
* **Circular**: There are infinite ways in which the object into pieces that are identical if they are reflected or rotated
`!["timeEstimate", 2]!`
### Select the cuboid's face and top of the cuboid
Label the front face and top of the cuboid.
Refer to the [face guide](https://docs.google.com/document/d/e/2PACX-1vRG84YWUD9q3SGa15sdzVuezw72N9G9TuEb2FGmJvS2wwl6hVO9fSOlTCjOaYb8_BUsZg3840-WbPl0/pub#h.2l77lfiv64fa) for guidance on choosing the correct face / top for the object you are labeling! (tip: right click to *Open Link in a New Tab*)
## Adjust the cuboid visibility in the timeline
* Visibility has to be selected in each of the three cameras
* This means that an object can be visible in one camera and not the others
There are two types of visibility criteria:
* **Occlusion**
* This means another object is blocking the visibility of the object
* **Truncation**
* This means the object is cut off the side of the frame
### Find a cuboid that is fully labeled
### Go the regular view
Switch views between `Regular` and `Grid views` in User Preferences


### Start at the first camera and the first frame
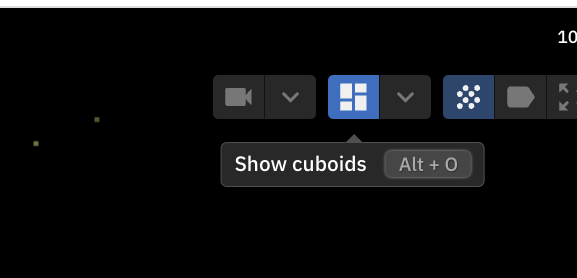
### Toggle `show cuboids` to turn them off
* The visibility should be done based on the object and not the cuboid.
### Open up the visibility timeline viewer
Note: the visibility timeline might not show up until you set the initial visibility (next step). That’s ok!
Find the label for this object in the label list, and apply it.
**Example of Tooling**: Description of gif/image:

`!["timeEstimate", 1]!`
### Select the initial / current Type of visibility for the object in that camera
* If it starts out Not visible, select that!
---
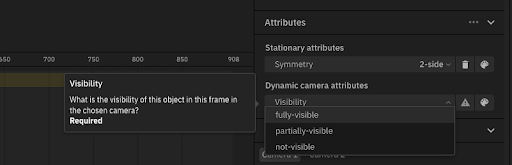
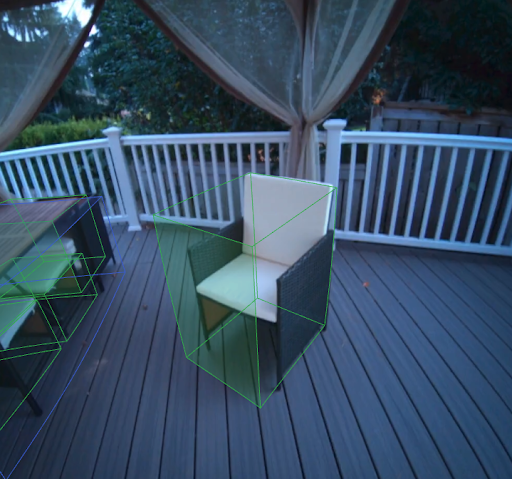
**Fully visible**
* The object is fully in the frame and is not blocked by any other objects
Examples of fully visible object:
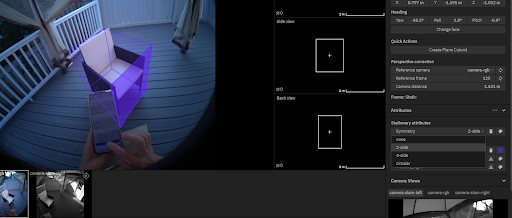
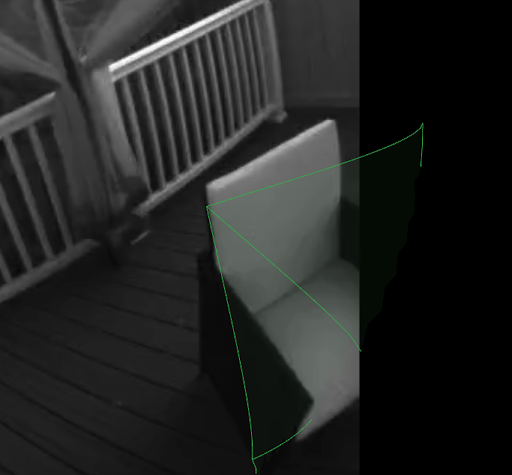
**Partially visible**
Examples of partially visible objects:
* In this image, the chair is partially occluded by the smartphone in the foreground of the image:
* In this image, the chair is partially truncated by the edge of the frame:
**Not visible**
* The object is entirely out of frame in the given camera, or the object is entirely blocked by another object so nothing is visible
---
### Play the video
When the visibility of the object changes, STOP
### Find the exact frame where the object changes visibility
For example, if it starts out not visible, find the first frame where it switches to partially or fully visible!
### Select the new Type of visibility!
You should see a colored line pop up. This labels the entire section between the labels as that visibility.
For example, if it changes from **Partially visible** to **Fully visible**, find the first frame where it is **Fully visible** and change that frame to `fully-visible`. Then every frame between the first keypoint that said `partially-visible` and the new `fully-visible` keypoint will be **Partially visible**!
### Keep going through the video, labeling the changes in visibility only
* Make sure to make the label the new visibility with the keypoint!
### When you’re done, watch the whole video to make sure that the visibility changes correctly throughout the whole video
### Repeat all previous steps with all 3 cameras!
## Repeat this workflow until every object is labeled
# Labeling a dynamic task
* You will be labeling **one dynamic object** and **many static objects** in this scene
* Dynamic object:
* Each dynamic object needs a single cuboid around it.
* The goal is to make sure that you create one cuboid that encompasses the entire object throughout the entire video.
* The cuboid should **move with the object**.
* The cuboid **should not change shape or size! **
* Static objects:
* Each static object needs a single cuboid around it.
* The goal is to make sure that you create one cuboid that encompasses the entire object throughout the entire video.
* When you create the static cuboid, it will populate and move as the camera moves automatically. The cuboid may look like it moves because the camera is moving, but if you remove the camera view the cuboid is (and should be) static.
* **Do not create keypoints** for static objects!
* This will move the actual cuboid itself, which we do not want. As you can see in the video below, although the chair’s cuboid looks like it’s moving on the camera view, the cuboid itself doesn’t move because no one changes the position of the chair (pushes it, turns it, etc.)
## Watch the entire video and identify all the objects in the scene
Determine whether the task is all-static (no objects are moved by a person) or dynamic (ONE object is moved by a person)
Tip: Press `spacebar` to play the video
## Identify the dynamic object in the scene
> Row 271-389 are copied from Static Workflow
## Choose a static object in the scene to use as a reference for the dynamic object's dimensions.
### Draw a cuboid around the static object
Navigate to a frame where the object is clear in the main / center camera and unblocked by other objects
---
Start in regular view and navigate to the middle camera (Camera 1).
**Add a new cuboid by going to the Cuboid annotation sidebar and clicking `+`, or hitting the `N` button:**

`!["timeEstimate", 2]!`
### Draw the initial cuboid
---
Make four clicks. First, click on each corner in the lower front part of the object. The third click represents the opposite corner on the bottom of your cuboid. The fourth click defines the height of your cuboid.
Always start by drawing the line at the front of the object. The first two clicks will decide the front part of the object.
**Example of Tooling**: Placing a cuboid on a chair:

`!["timeEstimate", 1]!`
### Adjust cuboid position & sizing relative to both 2D and 3D space
---
Switch to grid view. This will help you see all three cameras at once!
* Note that some of the examples below are not in grid view.
Adjust cuboid position and sizing so it looks as accurate as possible
* Adjust positioning and sizing using the side views or the sliders on the far right
* Switch between a few frames near the original frame and check that it all looks good!
**Adjusting positioning**:

**Adjusting sizing**:

`!["timeEstimate", 2]!`
### Adjust rotation as needed
For objects that are standing on a flat surface straight up and down, like this chair, the only rotation that is really relevant is Yaw.
Roll and pitch are not very relevant to these types of objects. However, if you tilted the chair in various directions, you might need to change the Roll and pitch
---
Switch between a few frames near the original frame and check that it all looks good!
**Adjusting rotation / pitch / roll**:

`!["timeEstimate", 1]!`
### Adjust the perspective correction
The perspective correct is where we determine the 7th degree of freedom: camera distance. This is how far away the object is from the camera!
---
* We set the camera distance on a specific frame and camera, generally the center camera (often called camera-rgb or Camera 1)
* When you first draw the cuboid, this distance will be calculated roughly for you. However, you need to adjust it using these toggles.
* Adjust the camera distance up and down until the cuboid lines up across all frames. You may also have to continue to adjust the size and position of the cuboid.
**Perspective correction panel**:

`!["timeEstimate", 3]!`
### Select the cuboid's label
Select the label of the annotated object in the item list.

---
`!["timeEstimate", 1]!`
### Select the cuboid's Symmetry
The symmetry of the object can be none, 2-sided, 4-sided, or circular.
Refer to the [symmetry guide](https://docs.google.com/document/d/e/2PACX-1vQr2z7XEGOLdgEiE5Tnse_gp1jgivMaOUhlJ9nHy81THBBef60BojRHaXhthh81vtszzBnKzKzb6Xnc/pub#h.vg4slv3ldyuf)
to see examples of symmetry for all labels!

---
* **None**: There is no way to cut the object into multiple pieces that look the same
* **2-side**: There are 2 identical sides of the object, so it can be cut into 2 pieces that look the same if they are reflected or rotated

* **4-side**: There are 4 identical sides of the object, so it can be cut into 4 pieces that look the same if they are reflected or rotated

* **Circular**: There are infinite ways in which the object into pieces that are identical if they are reflected or rotated

`!["timeEstimate", 2]!`
### Select the cuboid's face and top of the cuboid
Label the front face and top of the cuboid.
Refer to the [face guide](https://docs.google.com/document/d/e/2PACX-1vRG84YWUD9q3SGa15sdzVuezw72N9G9TuEb2FGmJvS2wwl6hVO9fSOlTCjOaYb8_BUsZg3840-WbPl0/pub#h.2l77lfiv64fa) for guidance on choosing the correct face / top for the object you are labeling!

## Adjust the cuboid visibility in the timeline
* Visibility has to be selected in each of the three cameras
* This means that an object can be visible in one camera and not the others
There are two types of visibility criteria:
* **Occlusion**
* This means another object is blocking the visibility of the object
* **Truncation**
* This means the object is cut off the side of the frame
### Select the static cuboid
> []Adjusted this from the template so it assumes there's only one static cuboid in the scene (the one that was drawn in previous parent step)

### Go the regular view
---
Switch views between `Regular` and `Grid views` in User Preferences


### Start at the first camera and the first frame

### Toggle `show cuboids` to turn them off
* The visibility should be done based on the object and not the cuboid.

### Open up the visibility timeline viewer
Note: the visibility timeline might not show up until you set the initial visibility (next step). That’s ok!

Find the label for this object in the label list, and apply it.
**Example of Tooling**: Description of gif/image:

`!["timeEstimate", 1]!`
### Select the initial / current Type of visibility for the object in that camera
* If it starts out Not visible, select that!
---

**Fully visible**
* The object is fully in the frame and is not blocked by any other objects
Examples of fully visible object:

**Partially visible**
Examples of partially visible objects:
* In this image, the chair is partially occluded by the smartphone in the foreground of the image:

* In this image, the chair is partially truncated by the edge of the frame:

**Not visible**
* The object is entirely out of frame in the given camera, or the object is entirely blocked by another object so nothing is visible
---
### Play the video
When the visibility of the object changes, STOP
### Find the exact frame where the object changes visibility
For example, if it starts out not visible, find the first frame where it switches to partially or fully visible!

### Select the new Type of visibility!
You should see a colored line pop up. This labels the entire section between the labels as that visibility.
For example, if it changes from **Partially visible** to **Fully visible**, find the first frame where it is **Fully visible** and change that frame to `fully-visible`. Then every frame between the first keypoint that said `partially-visible` and the new `fully-visible` keypoint will be **Partially visible**!
### Keep going through the video, labeling the changes in visibility only
* Make sure to make the label the new visibility with the keypoint!
### When you’re done, watch the whole video to make sure that the visibility changes correctly throughout the whole video

### Repeat all previous steps with all 3 cameras!
## Move to the first frame the dynamic object is visible
This will be the object the person filming picks up and manipulates. This will not happen until halfway through the scene!
### Draw a cuboid around the dynamic object
Navigate to a frame where the object is clear in the main / center camera and unblocked by other objects
---
Start in regular view and navigate to the middle camera (Camera 1).
**Add a new cuboid by going to the Cuboid annotation sidebar and clicking `+`, or hitting the `N` button:**

`!["timeEstimate", 2]!`
### Adjust cuboid position & sizing relative to both 2D and 3D space (use the static object as a reference)
---
Switch to grid view. This will help you see all three cameras at once!
* Note that some of the examples below are not in grid view.
Adjust cuboid position and sizing so it looks as accurate as possible
* Adjust positioning and sizing using the side views or the sliders on the far right
* Switch between a few frames near the original frame and check that it all looks good!
**Adjusting positioning**:

**Adjusting sizing**:

`!["timeEstimate", 2]!`
### Lock the dimensions / volume of the cuboid
When you feel good about the **static** part of the video, lock dimensions / volume of the cuboid.
* We do this because the object won’t change shape or size as it moves through space!
### Adjust cuboid rotation
For objects that are standing on a flat surface straight up and down, like this chair, the only rotation that is really relevant is Yaw.
Roll and pitch are not very relevant to these types of objects. However, if you tilted the chair in various directions, you might need to change the Roll and pitch
---
Switch between a few frames near the original frame and check that it all looks good!
**Adjusting rotation / pitch / roll**:

`!["timeEstimate", 1]!`
### Select the cuboid’s label
Select the label of the annotated object in the item list.

---
`!["timeEstimate", 1]!`
### Select the cuboid’s Symmetry
The symmetry of the object can be none, 2-sided, 4-sided, or circular.
Refer to the [symmetry guide](https://docs.google.com/document/d/e/2PACX-1vQr2z7XEGOLdgEiE5Tnse_gp1jgivMaOUhlJ9nHy81THBBef60BojRHaXhthh81vtszzBnKzKzb6Xnc/pub#h.vg4slv3ldyuf) to see examples of symmetry for all labels!

---
* **None**: There is no way to cut the object into multiple pieces that look the same
* **2-side**: There are 2 identical sides of the object, so it can be cut into 2 pieces that look the same if they are reflected or rotated

* **4-side**: There are 4 identical sides of the object, so it can be cut into 4 pieces that look the same if they are reflected or rotated

* **Circular**: There are infinite ways in which the object into pieces that are identical if they are reflected or rotated

`!["timeEstimate", 2]!`
### Select the cuboid's face and top of the cuboid
Label the front face and top of the cuboid.
Refer to the [face guide](https://docs.google.com/document/d/e/2PACX-1vRG84YWUD9q3SGa15sdzVuezw72N9G9TuEb2FGmJvS2wwl6hVO9fSOlTCjOaYb8_BUsZg3840-WbPl0/pub#h.2l77lfiv64fa) for guidance on choosing the correct face / top for the object you are labeling!

## Convert the object into a dynamic object
> []Do we still have to do this? (Unclear since we removed this section from the static workflow)
## Lock the position of the object when object wasn't touched
Let's lock the position of the object during the time it wasn't touched / manipulated.
### Go to one frame right before the object is manipulated (when the object is still).
Create a new keypoint by hitting `Shift` + `Enter`.
### Now go to Frame 1.
Create a new keypoint by hitting `Shift` + `Enter`.
### Change from Linear to Discrete
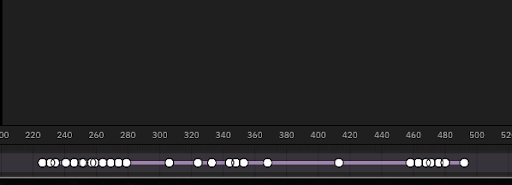
You should see a bar that looks like this spanning the entire time the object is still before it starts moving.
---
* Select into the middle of the bar
* Go to the sidebar. It should say `**Linear**`. Change this to `**Discrete**`. The bar will either become thicker or dotted.
* 
* This has now locked the position of the object for the whole section! Whenever you move the cuboid, it will move everywhere in this section!
* 
## Move to the first frame where the subject interacts with the dynamic object
This is the first frame where the object is manipulated.
### Adjust the position of the cuboid
Move the cuboid to match the current location in this frame. This will involve adjusting the cuboid’s [Movement in space](https://docs.google.com/document/d/1-19uugQ-U4qWKyGTO6XYu5cAo-e2_DY6_vk2xosRnoE/edit#heading=h.8aeyqz1ytj7u) and [Rotation in space](https://docs.google.com/document/d/1-19uugQ-U4qWKyGTO6XYu5cAo-e2_DY6_vk2xosRnoE/edit#heading=h.rbpaq2p847p2).
* [Adjust cuboid sizing and position](https://docs.google.com/document/d/1-19uugQ-U4qWKyGTO6XYu5cAo-e2_DY6_vk2xosRnoE/edit#heading=h.jlyby52lj41z)
* Check [perspective tests](https://docs.google.com/document/d/1-19uugQ-U4qWKyGTO6XYu5cAo-e2_DY6_vk2xosRnoE/edit#heading=h.6imoyamldin5) for this frame
## Move to the last frame where the subject interacts with the dynamic object
### Adjust the position of the cuboid
Move the cuboid to match the current location in this frame. This will involve adjusting the cuboid’s [Movement in space](https://docs.google.com/document/d/1-19uugQ-U4qWKyGTO6XYu5cAo-e2_DY6_vk2xosRnoE/edit#heading=h.8aeyqz1ytj7u) and [Rotation in space](https://docs.google.com/document/d/1-19uugQ-U4qWKyGTO6XYu5cAo-e2_DY6_vk2xosRnoE/edit#heading=h.rbpaq2p847p2).
* [Adjust cuboid sizing and position](https://docs.google.com/document/d/1-19uugQ-U4qWKyGTO6XYu5cAo-e2_DY6_vk2xosRnoE/edit#heading=h.jlyby52lj41z)
* Check [perspective tests](https://docs.google.com/document/d/1-19uugQ-U4qWKyGTO6XYu5cAo-e2_DY6_vk2xosRnoE/edit#heading=h.6imoyamldin5) for this frame
## Move to the last frame the dynamic object is visible
### Adjust the position of the cuboid
Move the cuboid to match the current location in this frame. This will involve adjusting the cuboid’s [Movement in space](https://docs.google.com/document/d/1-19uugQ-U4qWKyGTO6XYu5cAo-e2_DY6_vk2xosRnoE/edit#heading=h.8aeyqz1ytj7u) and [Rotation in space](https://docs.google.com/document/d/1-19uugQ-U4qWKyGTO6XYu5cAo-e2_DY6_vk2xosRnoE/edit#heading=h.rbpaq2p847p2).
* [Adjust cuboid sizing and position](https://docs.google.com/document/d/1-19uugQ-U4qWKyGTO6XYu5cAo-e2_DY6_vk2xosRnoE/edit#heading=h.jlyby52lj41z)
* Check [perspective tests](https://docs.google.com/document/d/1-19uugQ-U4qWKyGTO6XYu5cAo-e2_DY6_vk2xosRnoE/edit#heading=h.6imoyamldin5) for this frame
## Move back to the first frame where the subject interacts with the dynamic object
### Skip ahead 5 frames and adjust the position of the cuboid, repeat until reaching the last frame where the subject interacts with the dynamic object
Move the cuboid to match the current location in each frame. This will involve adjusting the cuboid’s [Movement in space](https://docs.google.com/document/d/1-19uugQ-U4qWKyGTO6XYu5cAo-e2_DY6_vk2xosRnoE/edit#heading=h.8aeyqz1ytj7u) and [Rotation in space](https://docs.google.com/document/d/1-19uugQ-U4qWKyGTO6XYu5cAo-e2_DY6_vk2xosRnoE/edit#heading=h.rbpaq2p847p2).
* [Adjust cuboid sizing and position](https://docs.google.com/document/d/1-19uugQ-U4qWKyGTO6XYu5cAo-e2_DY6_vk2xosRnoE/edit#heading=h.jlyby52lj41z)
* Check [perspective tests](https://docs.google.com/document/d/1-19uugQ-U4qWKyGTO6XYu5cAo-e2_DY6_vk2xosRnoE/edit#heading=h.6imoyamldin5) for this frame
### Move back to the first frame where the subject interacts with the dynamic object
### Fill out all the frames and adjust the keypoints in between until reaching the last frame where the subject interacts with the dynamic object
You will now have a series of jumpy keypoints throughout the entire dynamic section. There is a model that tries to interpolate the movement between each keypoint, **but it won’t be perfect. **
---
Go back through the entire section of frames 1 by 1 and add new keypoints / adjust the cuboid whenever the cuboid doesn’t line up anymore.
This might not mean you have a cuboid every single frame, but it should be close (every 2nd frame, for example).

## Adjust the object visibility in the timeline
* Visibility has to be selected in each of the three cameras
* This means that an object can be visible in one camera and not the others
There are two types of visibility criteria:
* **Occlusion**
* This means another object is blocking the visibility of the object
* **Truncation**
* This means the object is cut off the side of the frame
### Find a cuboid that is fully labeled

### Go the regular view
---
Switch views between `Regular` and `Grid views` in User Preferences


### Start at the first camera and the first frame

### Toggle `show cuboids` to turn them off
* The visibility should be done based on the object and not the cuboid.

### Open up the visibility timeline viewer
Note: the visibility timeline might not show up until you set the initial visibility (next step). That’s ok!

Find the label for this object in the label list, and apply it.
**Example of Tooling**: Description of gif/image:

`!["timeEstimate", 1]!`
### Select the initial / current Type of visibility for the object in that camera
* If it starts out Not visible, select that!
---

**Fully visible**
* The object is fully in the frame and is not blocked by any other objects
Examples of fully visible object:

**Partially visible**
Examples of partially visible objects:
* In this image, the chair is partially occluded by the smartphone in the foreground of the image:

* In this image, the chair is partially truncated by the edge of the frame:

**Not visible**
* The object is entirely out of frame in the given camera, or the object is entirely blocked by another object so nothing is visible
---
### Play the video
When the visibility of the object changes, STOP
### Find the exact frame where the object changes visibility
For example, if it starts out not visible, find the first frame where it switches to partially or fully visible!

### Select the new Type of visibility!
You should see a colored line pop up. This labels the entire section between the labels as that visibility.
For example, if it changes from **Partially visible** to **Fully visible**, find the first frame where it is **Fully visible** and change that frame to `fully-visible`. Then every frame between the first keypoint that said `partially-visible` and the new `fully-visible` keypoint will be **Partially visible**!
### Keep going through the video, labeling the changes in visibility only
* Make sure to make the label the new visibility with the keypoint!
### When you’re done, watch the whole video to make sure that the visibility changes correctly throughout the whole video

### Repeat all previous steps with all 3 cameras!
## Repeat until every object is labeled
 Sign in with Wallet
Connect another wallet
Sign in with Wallet
Connect another wallet