# Discord Bot講義-3
**注意!這個篇是Thonny IDE的版本,如果使用Replit點選[這裡](https://hackmd.io/@AndrewCho365/SySy7hoI0)**
## 學習內容
1. 架設Discord Bot
2. Discord Bot 訊息偵測、斜線指令
## 建立Discord Bot
### 機器人設置
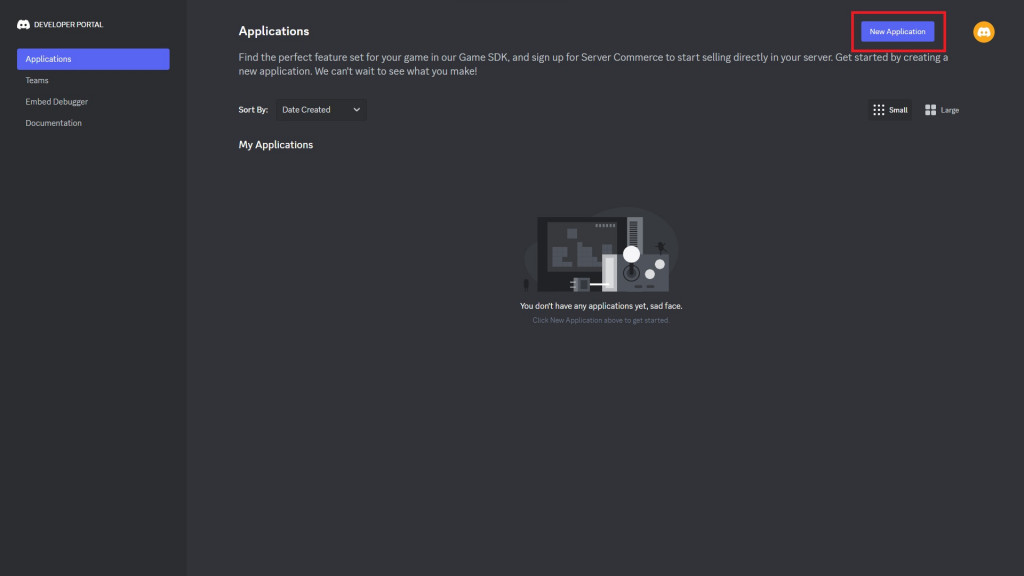
首先到[Discord 開發網站](https://discord.com/developers/applications)點下右上角的**New Application**
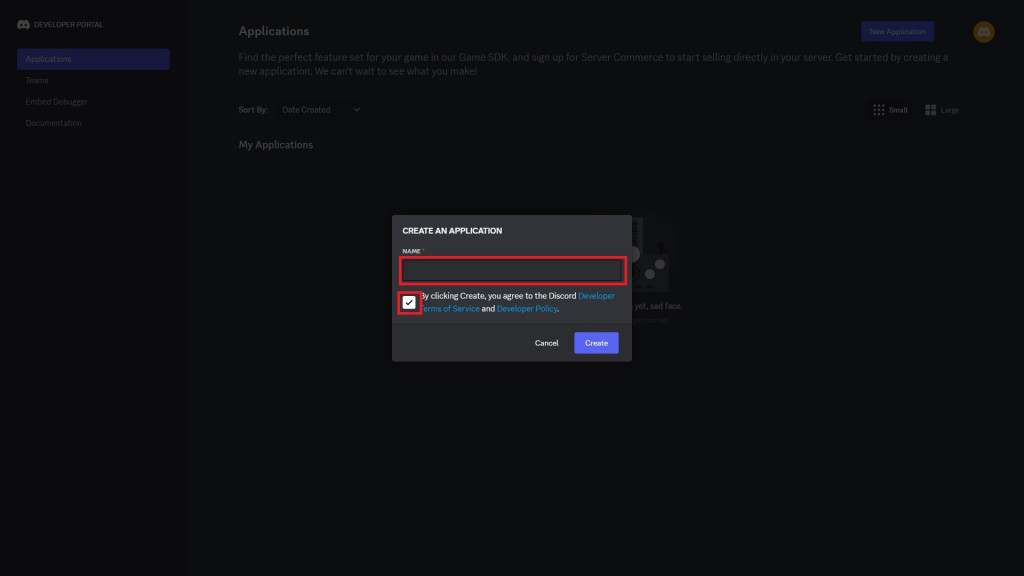
輸入你想要的機器人名稱(名稱不要包含**Discord**),記得勾選同意條款後再按下創建
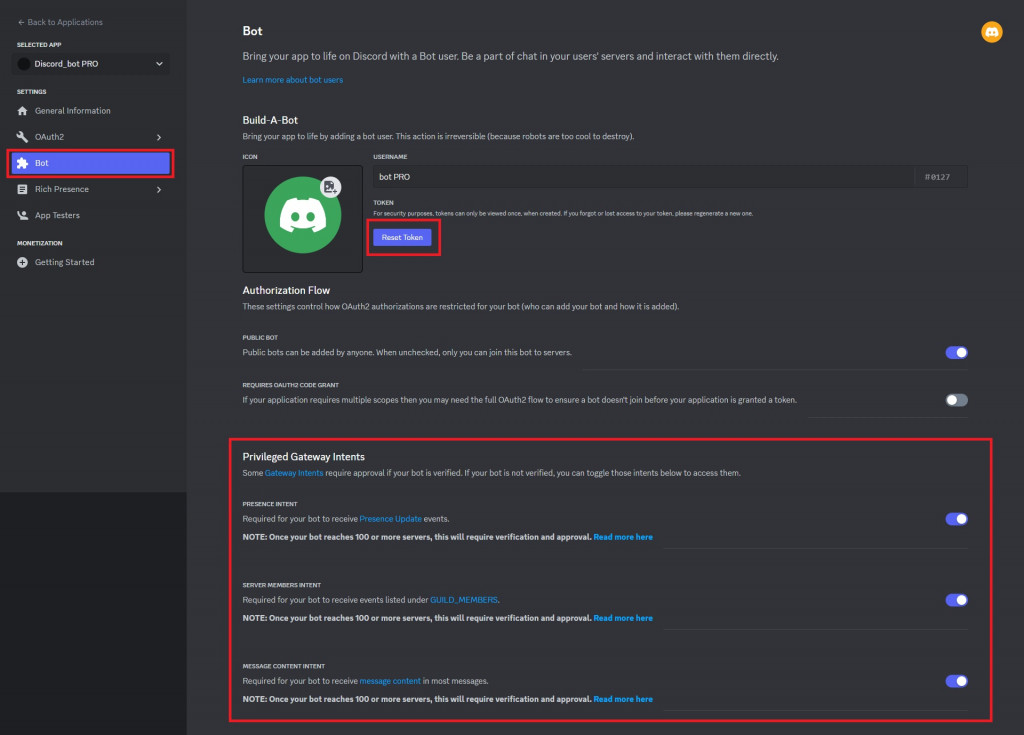
點選左邊的bot,到底下將Privileged Gateway Intents 的三個選項打開
然後按下紫色的Reset Token按鈕並複製Token(Token很重要不能告訴別人,也不行上傳到GitHub,會被官方掃描到並重置Token,可以找個自己的地方記錄下來)
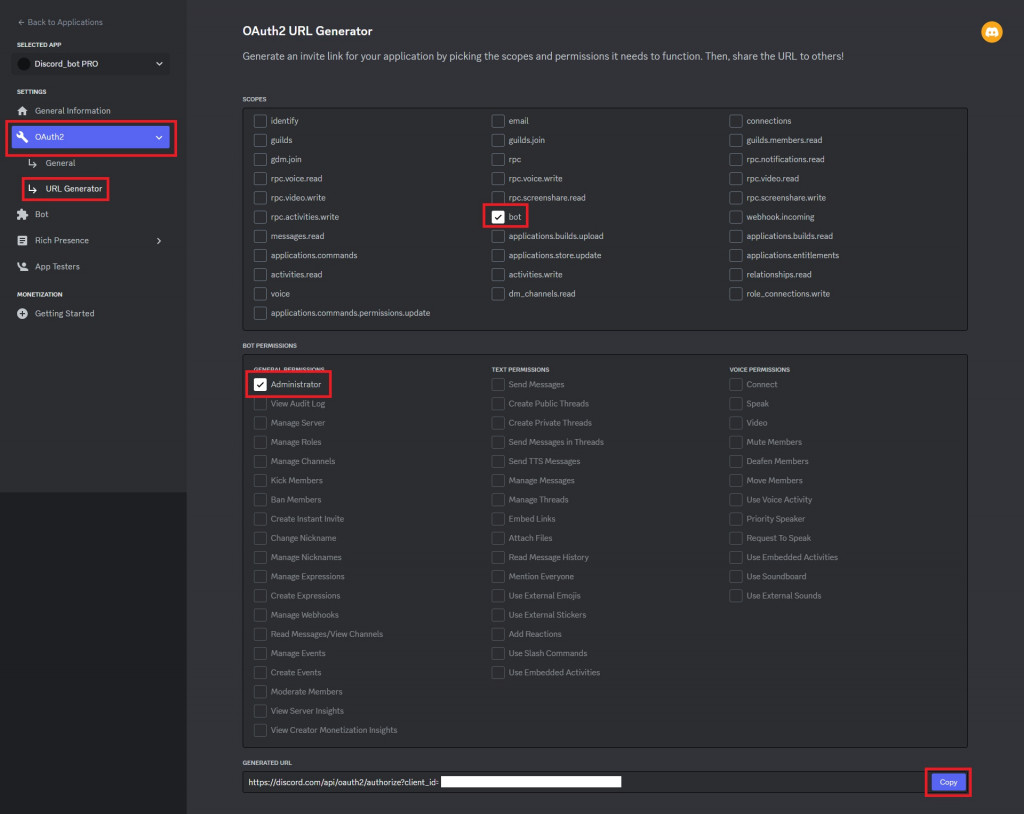
接著找到OAuth2的URL Generator
上下兩區選項分別勾選bot和Administrator,最後複製底下的網址到瀏覽器貼上
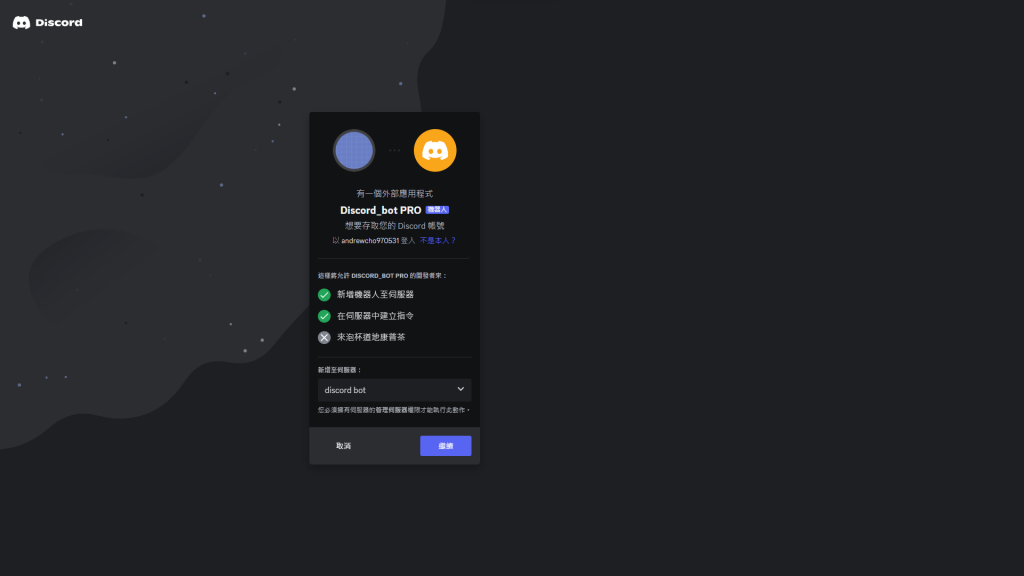
進到貼上的網址,選好想要的伺服器後點選繼續並授權將機器人加入伺服器
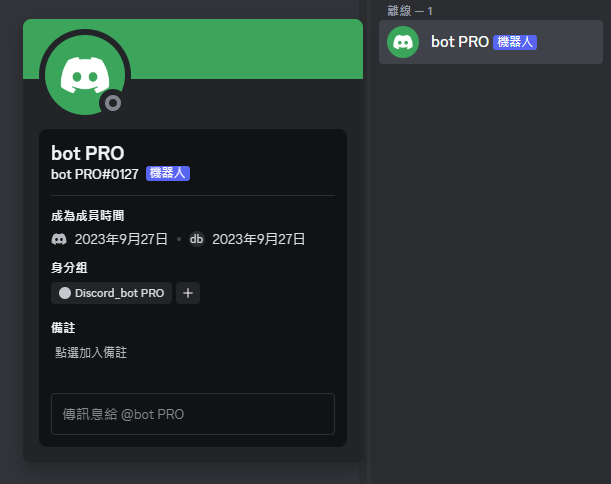
接著進入伺服器檢查機器人是否成功進入
下一步就是要讓機器人上線了!
### 基本程式碼編寫
在**main.py**輸入以下程式碼⬇️
```py=
import discord #導入discord
bot = discord.Bot(intents = discord.Intents.all())
#定義物件 intents是前面勾選的三個勾勾
@bot.event
async def on_ready():
print(f"「{bot.user}」已登入")
bot.run("bot_token")
```
### 環境安裝
點選工具→管理套件

輸入"py-cord"進行搜尋並安裝

## Discord Bot 訊息偵測、斜線指令
### 訊息偵測
| | 輸入 | 輸出 |
| :-----: | :----: | :----: |
| Python | input | print() |
| Discord Bot | message | await.XXX.send("XXX") |
### 偵測特定訊息並回復
```py=
@bot.event
async def on_message(message):
if message.author == bot.user:
return
if message.content == "hi": #如果有訊息為"hi"
await message.channel.send("hello!") #在此頻道發送"hello!"
```
### 偵測訊息開頭並回復
```py=
@bot.event
async def on_message(message):
if message.author == bot.user:
return
if message.content.startswith("你好"): #當開頭為"你好"
await message.channel.send("你好啊!") #在此頻道發送"你好啊!"
```
### 發送歡迎使用者加入訊息
```py=
@bot.event
async def on_member_join(member): #定義為使用者加入 調用member
wel_channel_id = 1234567891234567890 #發送頻道ID
wel_channel = bot.get_channel(wel_channel_id) #取得頻道
await wel_channel.send(f"歡迎 {member.mention} 加入!") #在該頻道發送訊息 mention能@到該使用者
```
#### 獲取頻道ID
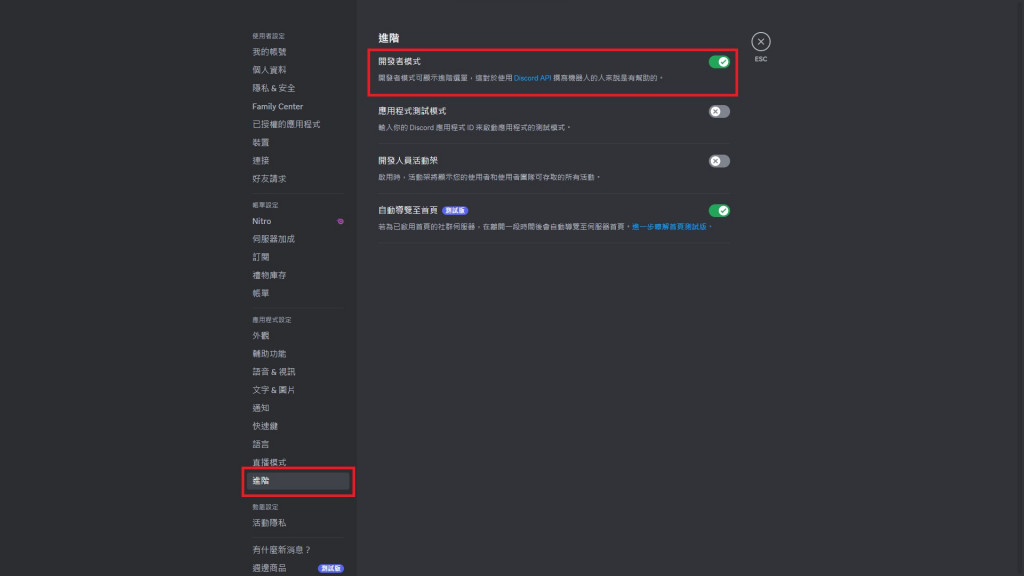
點擊左下角的設定

在左邊找到進階,把開發者模式打開
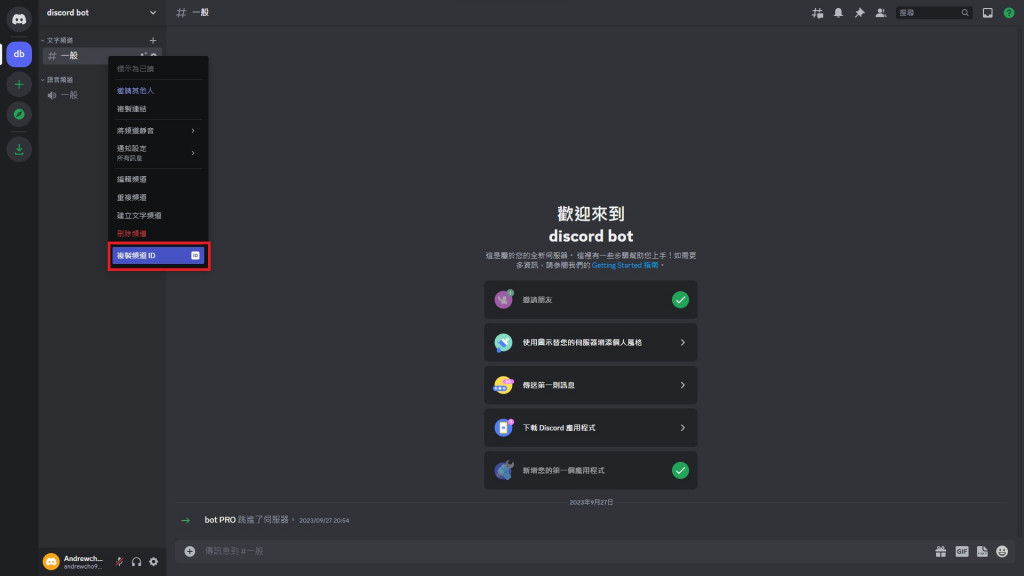
對頻道右鍵,點擊複製頻道ID
### 斜線指令
```py=
@bot.command(description="回復world") #description為備註(也可不放)
async def hello(ctx): #指令名稱為"hello" 並調用ctx
await ctx.respond("world") #回復"world"
```
如果有文字或數值需要使用者輸入
可以在ctx的後方加入輸入框設定
```py=
@bot.command(description="傳送訊息給伺服器")
async def text(ctx, message:str, 頻道id=None,pin=int):
if pin = 123456:
if 頻道id is not None:
channel = bot.get_channel(int(頻道id))
await channel.send(message)
else:
await ctx.send(message)
else:
await ctx.respond("驗證錯誤")
```
如果想要讓輸入框的內容是可以選擇內容(例:ABCD)
可以按照下方範例建立選單
```py=
@bot.command(description="禁言成員")
@option("禁言時間", description="時間選擇", choices=["1分鐘", "5分鐘", "10分鐘", "1小時", "1天", "1周", "解除禁言"])
async def 禁言(ctx ,被禁言者:discord.Member,禁言時間:str, pin=None):
```

有時候指令被執行後會需要大量運算或是時間延遲的,
可以在加入```await ctx.defer```傳送機器人受到指令的訊息
```py=
@bot.command(description="回復world")
async def hello(ctx):
await ctx.defer
await ctx.respond("world")
```

不過執行上方程式碼應該是看不到的效果的
因為電腦處理這條指令不需要很多時間
在後面的教學就會派上用場了
 Sign in with Wallet
Connect another wallet
Sign in with Wallet
Connect another wallet